
rust-animation 
rust-animation is an OpenGL based graphics library for creating hardware-accelerated user interfaces written in Rust. It is designed to implement a simple animated UI for embedded devices.
Note: this project is in early development stage so many features are still missing, some dependencies are experimental, and there are probably many bugs. Feel free to file any bugs.
Installation
rust-animation is written in Rust so you need to install Rust:
If you build rust-animation in Windows, you have to install cmake first.
Note: rust-animation is tested in Ubuntu 20.04, Windows10, and Mac OSX.
There are several examples so you can build them as follows:
Features
- 2D transforms: translate, scale, and rotate.
- Animations with easing functions
- Flex UI
Examples
ani.rs
$ cargo build --example ani
$ target/debug/examples/ani
This examples shows the basic animation features.
  let mut play = Play::new("Animation test".to_string());
  play.initialize();
  let mut stage = Stage::new("stage".to_string(), 1920, 1080, LayoutMode::UserDefine, None);
  stage.set_visible(true);

  let mut actor = Actor::new("actor_1".to_string(), 400, 225, None);
  actor.x = 100;
  actor.y = 100;
  actor.set_image("examples/splash.png".to_string());

  // 1X -> 2X for 5 sec.
  let time = 5.0;
  actor.apply_scale_animation(1.0, 2.0, time, EasingFunction::Linear);
  actor.apply_translation_x_animation(100, 1000, time, EasingFunction::EaseInOut);
  actor.apply_translation_y_animation(100, 300, time, EasingFunction::EaseInOut);
  actor.apply_rotation_animation(0, 360, time, EasingFunction::EaseInOut);

  let mut actor_2 = Play::new_actor("actor_2".to_string(), 120, 120, None);
  actor_2.x = 100;
  actor_2.y = 100;
  actor_2.scale_x = 1.5;
  actor_2.scale_y = 1.5;
  actor_2.set_color(0.0, 0.0, 1.0);
  // 0 degree -> 360 degree for 5 sec
  actor_2.apply_rotation_animation(0, 360, 5.0, EasingFunction::EaseInOut);

  let mut actor_3 = Play::new_actor("actor_3".to_string(), 50, 50, None);
  actor_3.x = 10;
  actor_3.y = 10;
  actor_3.set_color(1.0, 0.0, 0.0);
  actor_2.add_sub_actor(actor_3);

  stage.add_actor(actor);
  stage.add_actor(actor_2);
  play.add_stage(stage);

  while !window.should_close() {
    process_events(&mut window, &events);
    play.render();
    window.swap_buffers();
    glfw.poll_events();
  }
}
easing_functions.rs
You can see all the easing functions in this example.
$ target/debug/examples/easing_functions
$ cargo build --example easing_functions
let mut play = Play::new("Easing functions demo".to_string());
  play.initialize();
  let mut stage = Stage::new("stage".to_string(), 1920, 1080,
      LayoutMode::UserDefine, None);
  stage.set_visible(true);

  let easing_functions = vec![
      EasingFunction::EaseIn,
      EasingFunction::EaseInCubic,
      EasingFunction::EaseInOut,
      EasingFunction::EaseInOutCubic,
      EasingFunction::EaseInOutQuad,
      EasingFunction::EaseInOutQuart,
      EasingFunction::EaseInOutQuint,
      EasingFunction::EaseInQuad,
      EasingFunction::EaseInQuart,
      EasingFunction::EaseInQuint,
      EasingFunction::EaseOut,
      EasingFunction::EaseOutCubic,
      EasingFunction::EaseOutQuad,
      EasingFunction::EaseOutQuart,
      EasingFunction::EaseOutQuint,
      EasingFunction::Linear,
      EasingFunction::Step
  ];
  let mut y = 0;
  let time = 5.0;
  let width  = 63;
  let height = width;
  for i in 0..17 {
    let actor_name = format!("actor_{}", i+1);
    let mut actor = Actor::new(actor_name.to_string(), width, height, None);
    actor.x = 0;
    actor.y = y;
    y += height as i32;
    actor.set_color(i as f32 / 18.0, i as f32 / 18.0, i as f32 / 18.0);
    actor.apply_translation_x_animation(0, (1920 - width) as i32, time, easing_functions[i]);
    actor.apply_rotation_animation(0, 360, time, EasingFunction::Linear);
    stage.add_actor(actor);
  }
  play.add_stage(stage);

  while !window.should_close() {
    process_events(&mut window, &events);
    play.render();
    window.swap_buffers();
    glfw.poll_events();
  }
}
flex_ui.rs
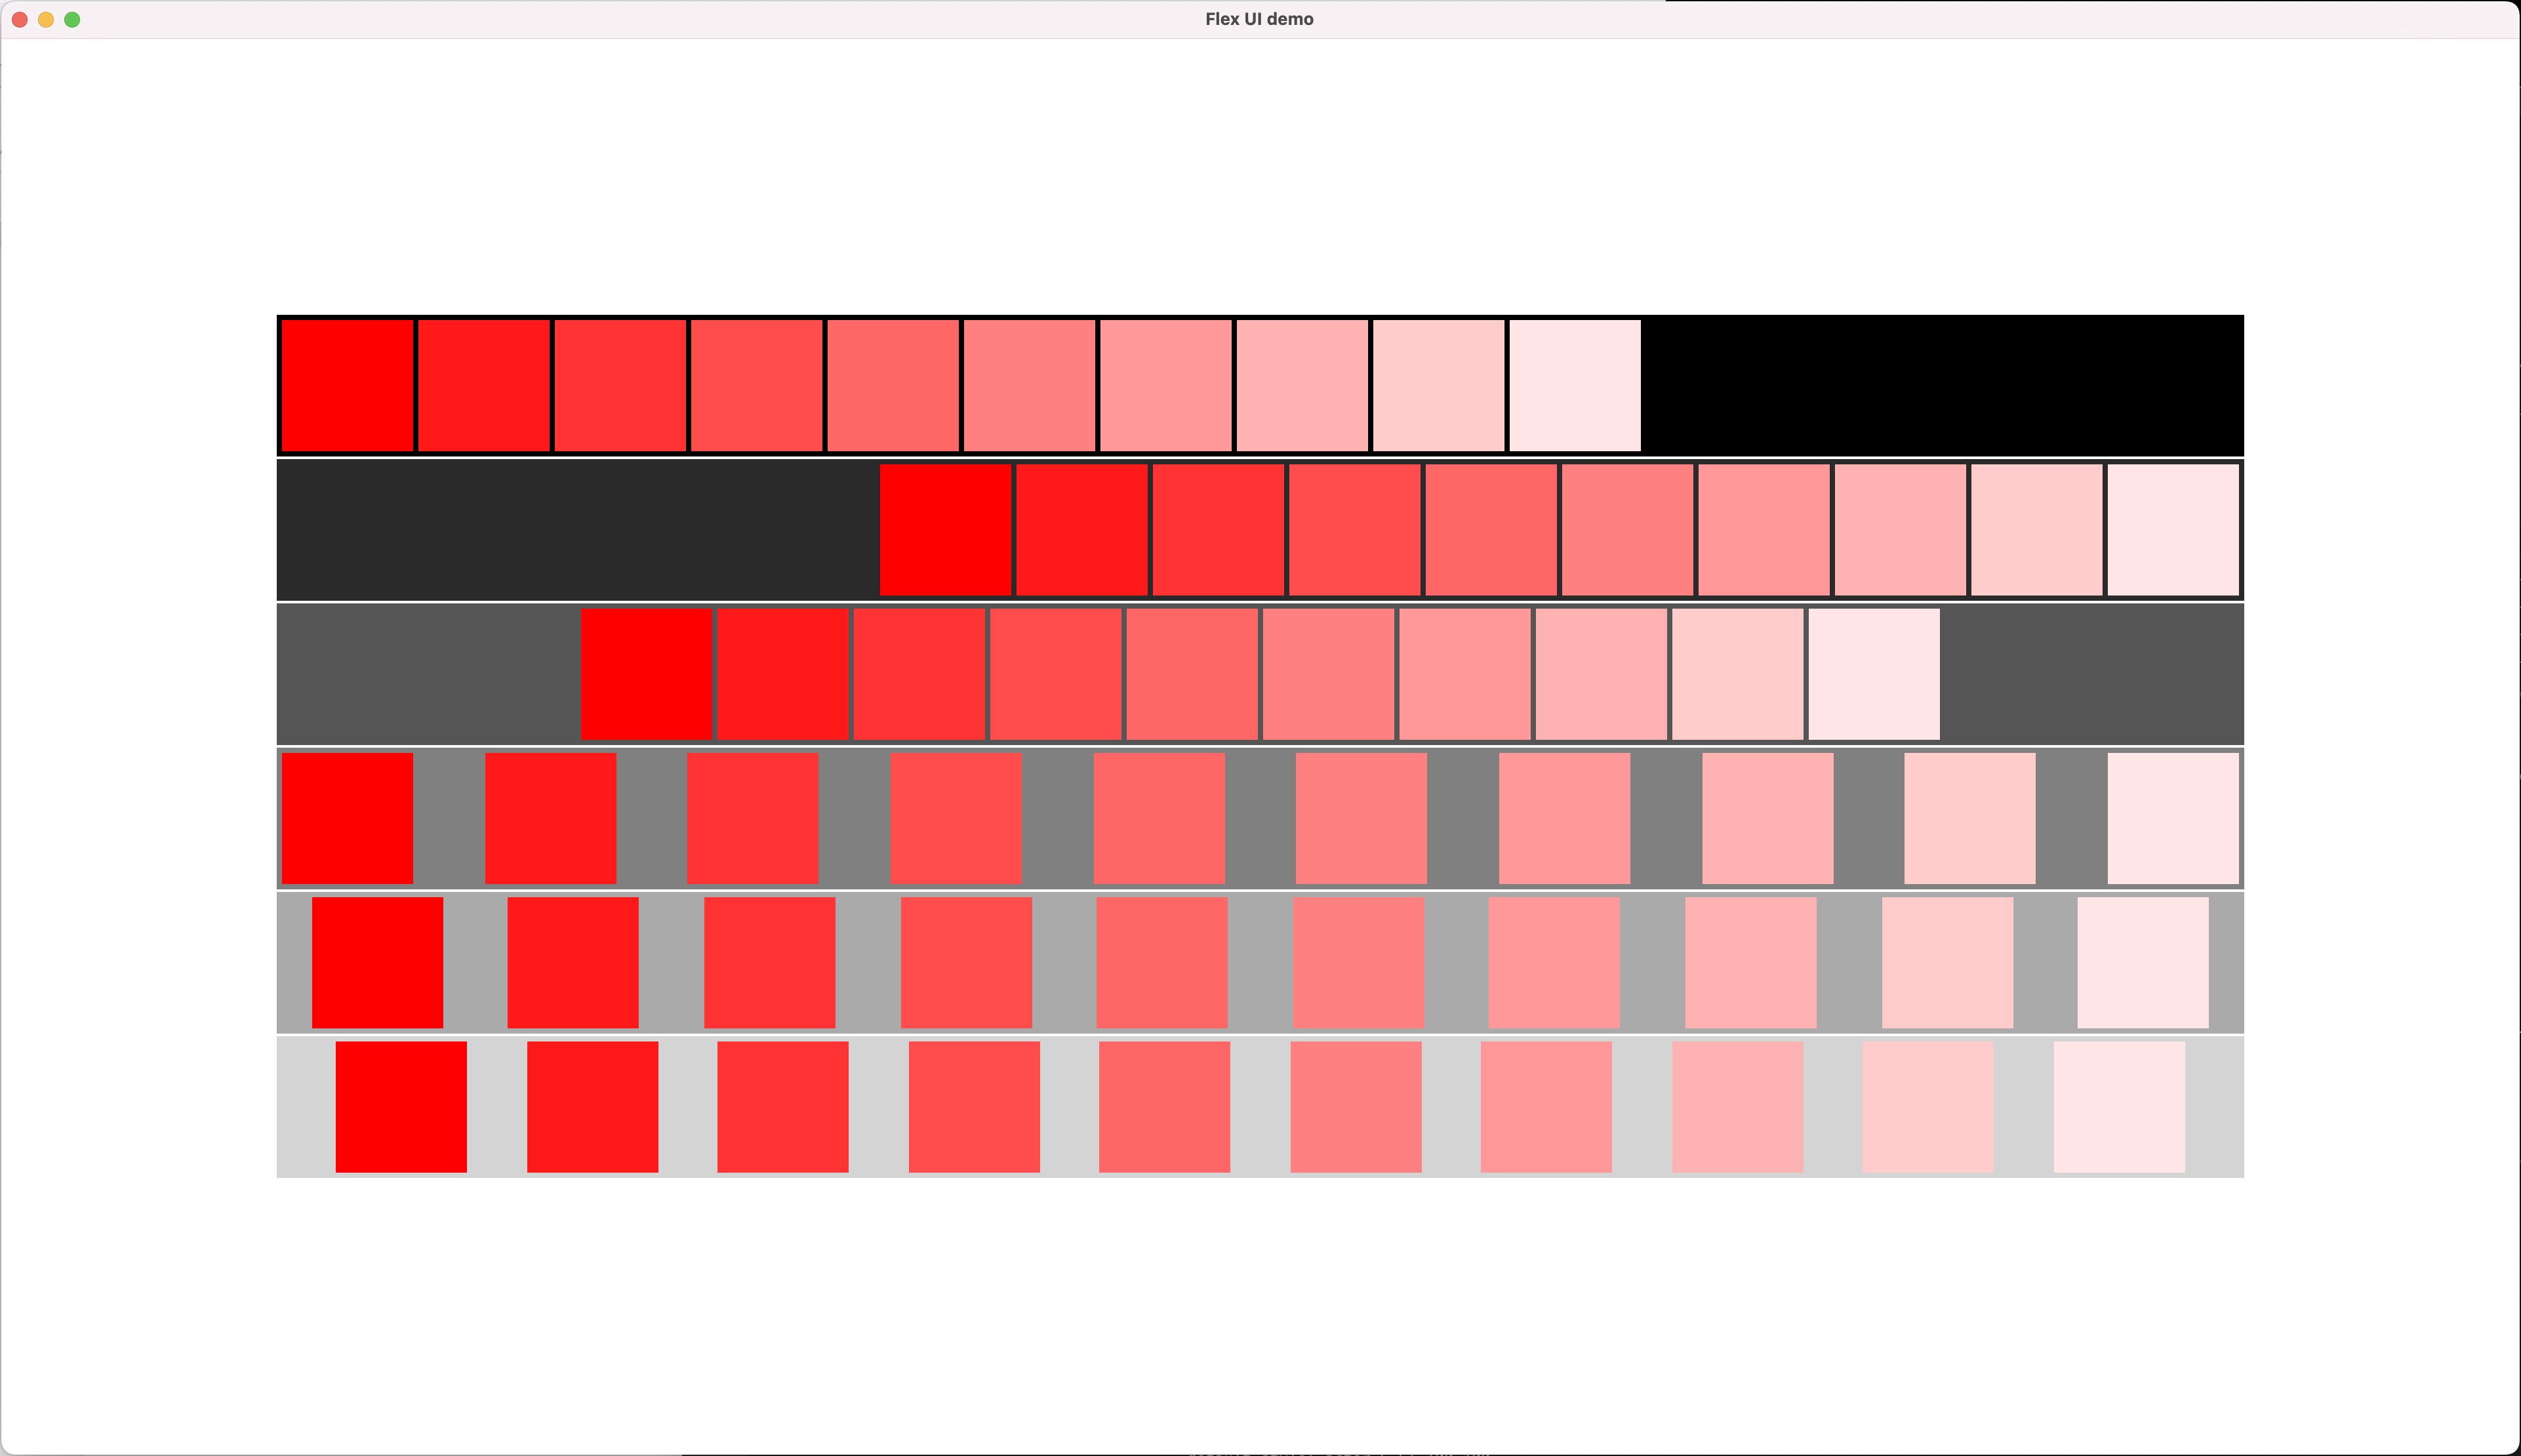 rust-animation experimentally uses Stretch to support Flex UI. You can apply a Stretch style to a stage or an actor. You can also implement your own layout using a Layout trait.
$ target/debug/examples/flex_ui
$ cargo build --example flex_ui
let mut stage = Stage::new("stage".to_string(), 1920, 1080, LayoutMode::Flex, None);
  stage.set_style(Style {
          size: Size {
              width: Dimension::Points(1920.0),
              height: Dimension::Points(1080.0),
          }, justify_content: JustifyContent::Center,
          flex_direction: FlexDirection::Column,
          align_items: AlignItems::Center,
          margin: Rect {
              start: Dimension::Points(1.0),
              end: Dimension::Points(1.0),
              top: Dimension::Points(1.0),
              bottom: Dimension::Points(1.0),
              ..Default::default()
          },
          ..Default::default()
        }
  );
  stage.set_visible(true);

  let justify_content = vec![
      JustifyContent::FlexStart,
      JustifyContent::FlexEnd,
      JustifyContent::Center,
      JustifyContent::SpaceBetween,
      JustifyContent::SpaceAround,
      JustifyContent::SpaceEvenly,
  ];
  let width  = 1500;
  let height = 108;
  for i in 0..6 {
    let actor_name = format!("actor_{}", i+1);
    let mut actor = Actor::new(actor_name.to_string(), width, height, None);
    actor.set_color(i as f32 / 6.0, i as f32 / 6.0, i as f32 / 6.0);
    actor.set_style(Style {
           size: Size {
              width: Dimension::Points(width as f32),
              height: Dimension::Points(height as f32),
          },
          justify_content: justify_content[i],
          align_items: AlignItems::Center,
          margin: Rect {
              start: Dimension::Points(1.0),
              end: Dimension::Points(1.0),
              top: Dimension::Points(1.0),
              bottom: Dimension::Points(1.0),
              ..Default::default()
          },
          padding: Rect {
              start: Dimension::Points(2.0),
              end: Dimension::Points(2.0),
              ..Default::default()
          },
          ..Default::default()
        }
    );
    for j in 0..10 {
      let mut sub_actor = Actor::new(format!("actor_{}_{}", i+1, j+1).to_string(),
          100, 100, None);
      sub_actor.set_color(1.0, j as f32 / 10.0, j as f32 / 10.0);
      actor.add_sub_actor(sub_actor);
    }
    stage.add_actor(actor);
  }
picture_viewer.rs
This example is still work in progress. The thumbnail view only works.
$ target/debug/examples/picture_viewer
$ cargo build --example picture_viewer