pub struct Screen<T> { /* private fields */ }Expand description
A screen that allows you to send commands to a charlcd driver (or whatever
that implements the Write trait).
Simple example
use charlcd::Screen;
use std::io::Write;

fn main() -> std::io::Result<()> {
    let mut screen = Screen::default()?; // will use "/dev/lcd" charlcd driver

    screen.clear()?;
    screen.write(b"hello, world!")?;
    screen.flash_backlight()?;
    screen.flush()?; // send all the previous commands to the driver at once

    Ok(())
}Implementations§
source§impl<T> Screen<T>where
T: Write,
impl<T> Screen<T>where T: Write,
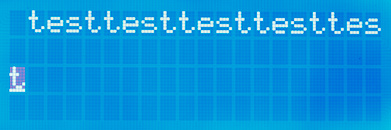
sourcepub fn kill_eol(&mut self) -> Result<()>
pub fn kill_eol(&mut self) -> Result<()>
Clean the rest of the current line, from current cursor position.
Example
use std::io::Write;
use charlcd::Screen;

fn main() -> std::io::Result<()> {
    let mut screen = Screen::default()?;

    for _ in 1..5 {
        screen.write(b"test")?;
    }
    for _ in 1..8 {
        screen.back()?;
    }
    screen.flush()?; // before

    screen.kill_eol()?;
    screen.flush()?; // after

    Ok(())
}
Live footage (before and after)


sourcepub fn reinit(&mut self) -> Result<()>
pub fn reinit(&mut self) -> Result<()>
Reinitialize the display to its default hardware values.
Example
use std::io::Write;
use charlcd::Screen;

fn main() -> std::io::Result<()> {
    let mut screen = Screen::default()?;

    for _ in 1..20 {
        screen.write(b"test")?;
    }
    screen.flush()?; // before

    screen.reinit()?;
    screen.flush()?; // after

    Ok(())
}
Live footage (before and after)


Note: we observe that the cursor and blink are activated after a call
to Screen::reinit(), although the Screen::blink_on() and
Screen::cursor_on() methods are not called in this function. We
can deduce it is a hardware default to put back the blink and cursor on
at initialization.
You may want to disable them after a call to this function by using the
Screen::blink_off() and Screen::cursor_off() functions.
sourcepub fn display_off(&mut self) -> Result<()>
pub fn display_off(&mut self) -> Result<()>
Disable the display.
The displayed content is not lost and kept into the screen buffer. Call
Screen::display_on() to display back what was printed to the screen.
Example
use std::io::Write;
use charlcd::Screen;

fn main() -> std::io::Result<()> {
    let mut screen = Screen::default()?;

    for _ in 1..20 {
        screen.write(b"test")?;
    }
    screen.flush()?; // before

    screen.display_off()?;
    screen.flush()?; // after

    Ok(())
}
Live footage (before and after)

sourcepub fn display_on(&mut self) -> Result<()>
pub fn display_on(&mut self) -> Result<()>
Enable the display.
The content of the screen buffer will be displayed back with no change.
Example
use std::io::Write;
use charlcd::Screen;

fn main() -> std::io::Result<()> {
    let mut screen = Screen::default()?;

    for _ in 1..20 {
        screen.write(b"test")?;
    }
    screen.flush()?;

    screen.display_off()?;
    screen.flush()?; // before

    screen.display_on()?;
    screen.flush()?; // after

    Ok(())
}
Live footage (before and after)
sourcepub fn cursor_on(&mut self) -> Result<()>
pub fn cursor_on(&mut self) -> Result<()>
Enable the underscore cursor (independent of blinking cursor).
Example
use std::io::Write;
use charlcd::Screen;

fn main() -> std::io::Result<()> {
    let mut screen = Screen::default()?;

    screen.write(b"test")?;
    screen.flush()?; // before

    screen.cursor_on()?;
    screen.flush()?; // after

    Ok(())
}
Live footage (before and after)


sourcepub fn cursor_off(&mut self) -> Result<()>
pub fn cursor_off(&mut self) -> Result<()>
Disable the underscore cursor (independent of blinking cursor).
Example
use std::io::Write;
use charlcd::Screen;

fn main() -> std::io::Result<()> {
    let mut screen = Screen::default()?;

    screen.write(b"test")?;
    screen.cursor_on()?;
    screen.flush()?; // before

    screen.cursor_off()?;
    screen.flush()?; // after

    Ok(())
}
Live footage (before and after)


sourcepub fn blink_on(&mut self) -> Result<()>
pub fn blink_on(&mut self) -> Result<()>
Enable the blinking cursor (independent of underscore cursor).
Example
use std::io::Write;
use charlcd::Screen;

fn main() -> std::io::Result<()> {
    let mut screen = Screen::default()?;

    screen.write(b"test")?;
    screen.flush()?; // before

    screen.blink_on()?;
    screen.flush()?; // after

    Ok(())
}
Live footage (before and after)
Note: due to long exposure duration of the camera (1 second), the blinking cursor appears dim in the footage.
sourcepub fn blink_off(&mut self) -> Result<()>
pub fn blink_off(&mut self) -> Result<()>
Disable the blinking cursor (independent of underscore cursor).
Example
use std::io::Write;
use charlcd::Screen;

fn main() -> std::io::Result<()> {
    let mut screen = Screen::default()?;

    screen.write(b"test")?;
    screen.blink_on()?;
    screen.flush()?; // before

    screen.blink_off()?;
    screen.flush()?; // after

    Ok(())
}
Live footage (before and after)
sourcepub fn backlight_on(&mut self) -> Result<()>
pub fn backlight_on(&mut self) -> Result<()>
Enable the backlight.
Example
use std::io::Write;
use charlcd::Screen;

fn main() -> std::io::Result<()> {
    let mut screen = Screen::default()?;

    screen.write(b"test")?;
    screen.backlight_off()?;
    screen.flush()?; // before

    screen.backlight_on()?;
    screen.flush()?; // after

    Ok(())
}
Note: due to poor light conditions, it is not easy to illustrate the before and after steps with a photography. The backlight term should be straightforward to understand so that a picture is not needed afterall.
sourcepub fn backlight_off(&mut self) -> Result<()>
pub fn backlight_off(&mut self) -> Result<()>
Disable the backlight.
Example
use std::io::Write;
use charlcd::Screen;

fn main() -> std::io::Result<()> {
    let mut screen = Screen::default()?;

    screen.write(b"test")?;
    screen.backlight_on()?;
    screen.flush()?; // before

    screen.backlight_off()?;
    screen.flush()?; // after

    Ok(())
}
Note: due to poor light conditions, it is not easy to illustrate the before and after steps with a photography. The backlight term should be straightforward to understand so that a picture is not needed afterall.
sourcepub fn flash_backlight(&mut self) -> Result<()>
pub fn flash_backlight(&mut self) -> Result<()>
Flash the backlight during a small duration.
The exact duration is specified in the driver. As of today, the default
value is set to 4 seconds (see the LCD_BL_TEMPO_PERIOD define of
the charlcd.c driver in your Linux tree).
Example
use std::io::Write;
use charlcd::Screen;

fn main() -> std::io::Result<()> {
    let mut screen = Screen::default()?;

    screen.write(b"test")?;
    screen.backlight_off()?;
    screen.flush()?; // before

    screen.flash_backlight()?;
    screen.flush()?; // after

    // after some time, the screen backlight goes off by itself

    Ok(())
}
Note: due to poor light conditions, it is not easy to illustrate the before and after steps with a photography. The backlight term should be straightforward to understand so that a picture is not needed afterall.
sourcepub fn clear(&mut self) -> Result<()>
pub fn clear(&mut self) -> Result<()>
Clear the screen and return the cursor at original (0, 0) XY position.
Example
use std::io::Write;
use charlcd::Screen;

fn main() -> std::io::Result<()> {
    let mut screen = Screen::default()?;

    screen.reinit()?;
    screen.write(b"test")?;
    screen.flush()?; // before

    screen.clear()?;
    screen.flush()?; // after

    Ok(())
}
Live footage (before and after)
Examples found in repository?
More examples
5
6
7
8
9
10
11
12
13
14
15
16
17
18
19
20
21
22
23
fn main() -> std::io::Result<()> {
let mut screen = Screen::default()?;
// Alarm symbol
screen.custom_char(0, [0x04, 0x0E, 0x0E, 0x0E, 0x0E, 0x1F, 0x04, 0x00])?;
screen.custom_char(1, custom_char::RIGHT_TRIANGLE)?;
screen.custom_char(2, custom_char::LEFT_TRIANGLE)?;
screen.custom_char(3, custom_char::UP_TRIANGLE)?;
screen.custom_char(4, custom_char::DOWN_TRIANGLE)?;
screen.clear()?;
screen.write(b"\x00 Alarm 10:00\n")?;
screen.write(b"\x01\x02 X Arrows\n")?;
screen.write(b"\x03\x04 Y Arrow")?;
screen.flush()?;
Ok(())
}5 6 7 8 9 10 11 12 13 14 15 16 17 18 19 20 21 22 23 24 25 26 27 28 29 30 31 32 33 34 35
fn main() -> std::io::Result<()> {
let mut screen = Screen::default()?;
screen.clear()?;
screen.write(&[special_char::ALPHA])?;
screen.write(&[special_char::BETA])?;
screen.write(&[special_char::EPSILON])?;
screen.write(&[special_char::MU])?;
screen.write(&[special_char::SIGMA])?;
screen.write(&[special_char::RO])?;
screen.write(&[special_char::THETA])?;
screen.write(&[special_char::OMEGA])?;
screen.write(&[special_char::SIGMA_UPPER])?;
screen.write(&[special_char::PI])?;
screen.write(b"\n")?;
screen.write(&[special_char::SQRT])?;
screen.write(&[special_char::INV])?;
screen.write(&[special_char::INFINITE])?;
screen.write(&[special_char::DIV])?;
screen.write(&[special_char::MEAN])?;
screen.write(&[special_char::MEDIAN_DOT])?;
screen.write(&[special_char::BLOCK])?;
screen.flush()?;
Ok(())
}sourcepub fn back(&mut self) -> Result<()>
pub fn back(&mut self) -> Result<()>
Move the cursor back one character, and delete the character at this position.
This is an utility function that will send the raw byte value for the
'\b' escape sequence. This sequence is valid in C, but is not
available in Rust.
Example
use std::io::Write;
use charlcd::Screen;

fn main() -> std::io::Result<()> {
    let mut screen = Screen::default()?;

    screen.reinit()?;
    screen.write(b"test")?;
    screen.flush()?; // before

    screen.back()?;
    screen.flush()?; // after

    Ok(())
}
Live footage (before and after)

sourcepub fn shift_cursor_left(&mut self) -> Result<()>
pub fn shift_cursor_left(&mut self) -> Result<()>
Shift cursor left.
Example
use std::io::Write;
use charlcd::Screen;

fn main() -> std::io::Result<()> {
    let mut screen = Screen::default()?;

    screen.reinit()?;
    screen.write(b"test")?;
    screen.flush()?; // before

    screen.shift_cursor_left()?;
    screen.flush()?; // after

    Ok(())
}
Live footage (before and after)

sourcepub fn shift_cursor_right(&mut self) -> Result<()>
pub fn shift_cursor_right(&mut self) -> Result<()>
Shift cursor right.
Example
use std::io::Write;
use charlcd::Screen;

fn main() -> std::io::Result<()> {
    let mut screen = Screen::default()?;

    screen.reinit()?;
    screen.write(b"test")?;
    screen.flush()?; // before

    screen.shift_cursor_right()?;
    screen.flush()?; // after

    Ok(())
}
Live footage (before and after)

sourcepub fn shift_display_left(&mut self) -> Result<()>
pub fn shift_display_left(&mut self) -> Result<()>
Shift display left.
Example
use std::io::Write;
use charlcd::Screen;

fn main() -> std::io::Result<()> {
    let mut screen = Screen::default()?;

    screen.reinit()?;
    for _ in 1..5 {
        screen.write(b"test")?;
    }
    screen.flush()?; // before

    screen.shift_display_left()?;
    screen.flush()?; // after

    Ok(())
}
Live footage (before and after)


Note: we can observe that the shift will create an artefact on the n+2 line, as the extra characters will be shifted there.
sourcepub fn shift_display_right(&mut self) -> Result<()>
pub fn shift_display_right(&mut self) -> Result<()>
Shift display right.
Example
use std::io::Write;
use charlcd::Screen;

fn main() -> std::io::Result<()> {
    let mut screen = Screen::default()?;

    screen.reinit()?;
    for _ in 1..5 {
        screen.write(b"test")?;
    }
    screen.flush()?; // before

    screen.shift_display_right()?;
    screen.flush()?; // after

    Ok(())
}
Live footage (before and after)
Note: we can observe that the shift will create an artefact on the n+2 line, as the extra characters will be shifted there.
sourcepub fn one_line(&mut self) -> Result<()>
pub fn one_line(&mut self) -> Result<()>
Enable one line mode.
Example
use std::io::Write;
use charlcd::Screen;

fn main() -> std::io::Result<()> {
    let mut screen = Screen::default()?;

    screen.reinit()?;
    for _ in 1..20 {
        screen.write(b"test")?;
    }
    screen.flush()?; // before

    screen.one_line()?;
    screen.flush()?; // after

    Ok(())
}
Live footage (before and after)

We can see that the screen seems to disable power for the second and fourth line of the display (in case of a 4 lines one). Cutting the power for half the screen means that the contrast adjustment will not be correct anymore, as the screen uses less power by managing only half of the characters.
A manual recalibration of the contrast will be necessary if you change
between Screen::one_line() and Screen::two_lines() modes.
sourcepub fn two_lines(&mut self) -> Result<()>
pub fn two_lines(&mut self) -> Result<()>
Enable two lines mode.
Example
use std::io::Write;
use charlcd::Screen;

fn main() -> std::io::Result<()> {
    let mut screen = Screen::default()?;

    screen.reinit()?;
    for _ in 1..20 {
        screen.write(b"test")?;
    }
    screen.one_line()?;
    screen.flush()?; // before

    screen.two_lines()?;
    screen.flush()?; // after

    Ok(())
}
Live footage (before and after)

This will mess up the screen if coming from Screen::one_line() mode.
A manual recalibration of the contrast will be necessary if you change
between Screen::one_line() and Screen::two_lines() modes.
sourcepub fn small_font(&mut self) -> Result<()>
pub fn small_font(&mut self) -> Result<()>
Enable small font mode.
Note: this function seems to have no effect on the screen after tests with multiple screen variants. No relevant footage available.
sourcepub fn large_font(&mut self) -> Result<()>
pub fn large_font(&mut self) -> Result<()>
Enable big font mode.
Note: this function seems to have no effect on the screen after tests with multiple screen variants. No relevant footage available.
sourcepub fn custom_char(&mut self, code: u8, value: [u8; 8]) -> Result<()>
pub fn custom_char(&mut self, code: u8, value: [u8; 8]) -> Result<()>
Store a custom character into the screen memory for future usage.
See also custom_char module for a global explanation on how to
declare custom characters, as well as a list of already defined custom
characters.
Example
use std::io::Write;
use charlcd::{Screen, custom_char};

fn main() -> std::io::Result<()> {
    let mut screen = Screen::default()?;

    screen.reinit()?;

    // Store the custom ▸ character in the screen memory, code 0
    screen.custom_char(0, custom_char::RIGHT_TRIANGLE)?;

    // Print custom character from screen memory, code 0
    screen.write(b"\x00")?;
    screen.flush()?;

    Ok(())
}
Examples found in repository?
5
6
7
8
9
10
11
12
13
14
15
16
17
18
19
20
21
22
23
fn main() -> std::io::Result<()> {
let mut screen = Screen::default()?;
// Alarm symbol
screen.custom_char(0, [0x04, 0x0E, 0x0E, 0x0E, 0x0E, 0x1F, 0x04, 0x00])?;
screen.custom_char(1, custom_char::RIGHT_TRIANGLE)?;
screen.custom_char(2, custom_char::LEFT_TRIANGLE)?;
screen.custom_char(3, custom_char::UP_TRIANGLE)?;
screen.custom_char(4, custom_char::DOWN_TRIANGLE)?;
screen.clear()?;
screen.write(b"\x00 Alarm 10:00\n")?;
screen.write(b"\x01\x02 X Arrows\n")?;
screen.write(b"\x03\x04 Y Arrow")?;
screen.flush()?;
Ok(())
}pub fn gotoxy(&mut self, x: u32, y: u32) -> Result<()>
pub fn gotox(&mut self, x: u32) -> Result<()>
pub fn gotoy(&mut self, y: u32) -> Result<()>
source§impl Screen<BufWriter<File>>
impl Screen<BufWriter<File>>
sourcepub fn from_dev_path(path: &Path) -> Result<Screen<BufWriter<File>>>
pub fn from_dev_path(path: &Path) -> Result<Screen<BufWriter<File>>>
Create a Screen instance based on the passed path to the device.
sourcepub fn default() -> Result<Screen<BufWriter<File>>>
pub fn default() -> Result<Screen<BufWriter<File>>>
Create a default Screen instance based on /dev/lcd device driver
path.
Examples found in repository?
More examples
5
6
7
8
9
10
11
12
13
14
15
16
17
18
19
20
21
22
23
fn main() -> std::io::Result<()> {
let mut screen = Screen::default()?;
// Alarm symbol
screen.custom_char(0, [0x04, 0x0E, 0x0E, 0x0E, 0x0E, 0x1F, 0x04, 0x00])?;
screen.custom_char(1, custom_char::RIGHT_TRIANGLE)?;
screen.custom_char(2, custom_char::LEFT_TRIANGLE)?;
screen.custom_char(3, custom_char::UP_TRIANGLE)?;
screen.custom_char(4, custom_char::DOWN_TRIANGLE)?;
screen.clear()?;
screen.write(b"\x00 Alarm 10:00\n")?;
screen.write(b"\x01\x02 X Arrows\n")?;
screen.write(b"\x03\x04 Y Arrow")?;
screen.flush()?;
Ok(())
}25 26 27 28 29 30 31 32 33 34 35 36 37 38 39 40 41 42 43 44 45 46 47 48 49
fn main() -> std::io::Result<()> {
let mut screen = Screen::default()?;
test_method!(screen, reinit);
test_method!(screen, display_off);
test_method!(screen, display_on);
test_method!(screen, backlight_on);
test_method!(screen, backlight_off);
test_method!(screen, cursor_off);
test_method!(screen, cursor_on);
test_method!(screen, blink_on);
test_method!(screen, blink_off);
test_method!(screen, shift_cursor_left);
test_method!(screen, shift_cursor_right);
test_method!(screen, shift_display_left);
test_method!(screen, kill_eol);
test_method!(screen, shift_display_right);
test_method!(screen, one_line);
test_method!(screen, two_lines);
// reinit everything back after the test
test_method!(screen, reinit);
Ok(())
}5 6 7 8 9 10 11 12 13 14 15 16 17 18 19 20 21 22 23 24 25 26 27 28 29 30 31 32 33 34 35
fn main() -> std::io::Result<()> {
let mut screen = Screen::default()?;
screen.clear()?;
screen.write(&[special_char::ALPHA])?;
screen.write(&[special_char::BETA])?;
screen.write(&[special_char::EPSILON])?;
screen.write(&[special_char::MU])?;
screen.write(&[special_char::SIGMA])?;
screen.write(&[special_char::RO])?;
screen.write(&[special_char::THETA])?;
screen.write(&[special_char::OMEGA])?;
screen.write(&[special_char::SIGMA_UPPER])?;
screen.write(&[special_char::PI])?;
screen.write(b"\n")?;
screen.write(&[special_char::SQRT])?;
screen.write(&[special_char::INV])?;
screen.write(&[special_char::INFINITE])?;
screen.write(&[special_char::DIV])?;
screen.write(&[special_char::MEAN])?;
screen.write(&[special_char::MEDIAN_DOT])?;
screen.write(&[special_char::BLOCK])?;
screen.flush()?;
Ok(())
}sourcepub fn width(&self) -> Result<u32>
pub fn width(&self) -> Result<u32>
Get the width of the screen, in number of characters it can display.
Example
use std::io::Write;
use charlcd::Screen;

fn main() -> std::io::Result<()> {
    let screen = Screen::default()?; // the screen is 20x4 in this test

    let width = screen.width()?;
    assert_eq!(width, 20);

    Ok(())
}
Important note
The implementation behind this function is currently a hack that will
go find the value in the auxdisplay platform device tree node in
/sys/devices/platform/auxdisplay/of_node/*. This is because the
charlcd driver does not export the width nor height fields to
userspace.
In the future, this function may be able to read the value directly
from the /dev/lcd device if a proper ioctl or read call is
implemented for this purpose.
sourcepub fn height(&self) -> Result<u32>
pub fn height(&self) -> Result<u32>
Get the height of the screen, in number of characters it can display.
Example
use std::io::Write;
use charlcd::Screen;

fn main() -> std::io::Result<()> {
    let screen = Screen::default()?; // the screen is 20x4 in this test

    let height = screen.height()?;
    assert_eq!(height, 4);

    Ok(())
}
Important note
The implementation behind this function is currently a hack that will
go find the value in the auxdisplay platform device tree node in
/sys/devices/platform/auxdisplay/of_node/*. This is because the
charlcd driver does not export the width nor height fields to
userspace.
In the future, this function may be able to read the value directly
from the /dev/lcd device if a proper ioctl or read call is
implemented for this purpose.
Trait Implementations§
source§impl<T> Write for Screen<T>where
T: Write,
impl<T> Write for Screen<T>where T: Write,
source§fn write(&mut self, buf: &[u8]) -> Result<usize>
fn write(&mut self, buf: &[u8]) -> Result<usize>
source§fn flush(&mut self) -> Result<()>
fn flush(&mut self) -> Result<()>
source§fn is_write_vectored(&self) -> bool
fn is_write_vectored(&self) -> bool
can_vector)1.0.0 · source§fn write_all(&mut self, buf: &[u8]) -> Result<(), Error>
fn write_all(&mut self, buf: &[u8]) -> Result<(), Error>
source§fn write_all_vectored(&mut self, bufs: &mut [IoSlice<'_>]) -> Result<(), Error>
fn write_all_vectored(&mut self, bufs: &mut [IoSlice<'_>]) -> Result<(), Error>
write_all_vectored)