# Personal Inventory(pinv)
### A simple TUI/CLI tool for organising parts, tools, and materials in shop or home
[](https://crates.io/crates/pinv)
[](./COPYING)
As a fairly unorganized electronics hoarder myself,
I have been long plagued with boxes of unused electronics and parts sitting around my room.
Thing being, things can get kinda cluttered given enough time and I finally decided
to put an end to it by designing my own personal inventory system: **pinv**.
**pinv** is a CLI/TUI organization tool meant for catagorizing and keeping track
of odds and ends around the house, from bags of capacitors and computer mice to
hazmat and your exotic lubricant collection.
It has an interface optimised for casual use by average(nerdy) joes, and includes few
features I find useful (such as printable lable generation).
Also since it is built in Rust, it is naturally a very robust program with minimal bugs by
design, and you can be sure that your data is very unlikely to be corrupted or unreachable
by a simple programming error.
## Usage
### Command Line Arguments
The following command line arguments work for any subcommand of pinv
- `-d <DATABASE>` or `--database <DATABASE>` - specify an alternate directory to use for your database
- `-v` or `--version` - display the version of pinv
- `-h` or `--help` - display the help message
### TUI
The TUI is started by running pinv with the "tui" subcommand, as follows
`pinv tui`
From there, you start in catagory view and have access to the catagory view modes.
#### Catagory View Modes:
- `a` - add catagory mode
- `f` - find mode
- `p` - fill svg template mode
Additionally, you can **exit the program by pressing "Esc" in Catagory View**,
**delete an empty catagory by pressing "Del"**, or enter **Entry View by
selecting a catagory and pressing "Enter" or "Return"**
In entry view, it will display what catagory you're in at the top of the screen
along with all entries in a catagory(if there are none it will be empty).
You also have access to the entry view modes
#### Entry View Modes:
- `a` - add entry mode
- `f` - find mode
- `F` - filter mode
- `+` - give mode
- `-` - take mode
- `m` - modify mode
- `p` - fill svg template mode
- `y` - yank entry mode
Additionally, you can **delete an entry by pressing "Del"**, **clear last applied
constraint by pressing "c"**, **clear all constraints by pressing "C"**, or
**return to catagory view by pressing "Esc"**
### TUI Mode Summaries
**You can exit any dialog at any time by pressing "Esc"**
#### Add Catagory Mode
In this mode you are presented a dialog to add a catagory. There is a "name"
field, in addition to a button to add a field to the catagory. You must have
at least one field in the catagory to create it.
When the add field button is selected, you are presented with another dialog to
specify the name and the type of the field. The name is case insensitive, cannot start with a number
and can only have alpha-numeric character in it, with some exceptions like underscores.
The type of the field determins what kind of data can be stored in it, and you have
the choice between "text" which is any string of text, "integer" which is any non-decimal
number, and "real" which is any number including decimal numbers. You can also
**press "Del" to delete a field you don't want**.
Once you have added the fields you want, you can select the add button to add
the catagory.
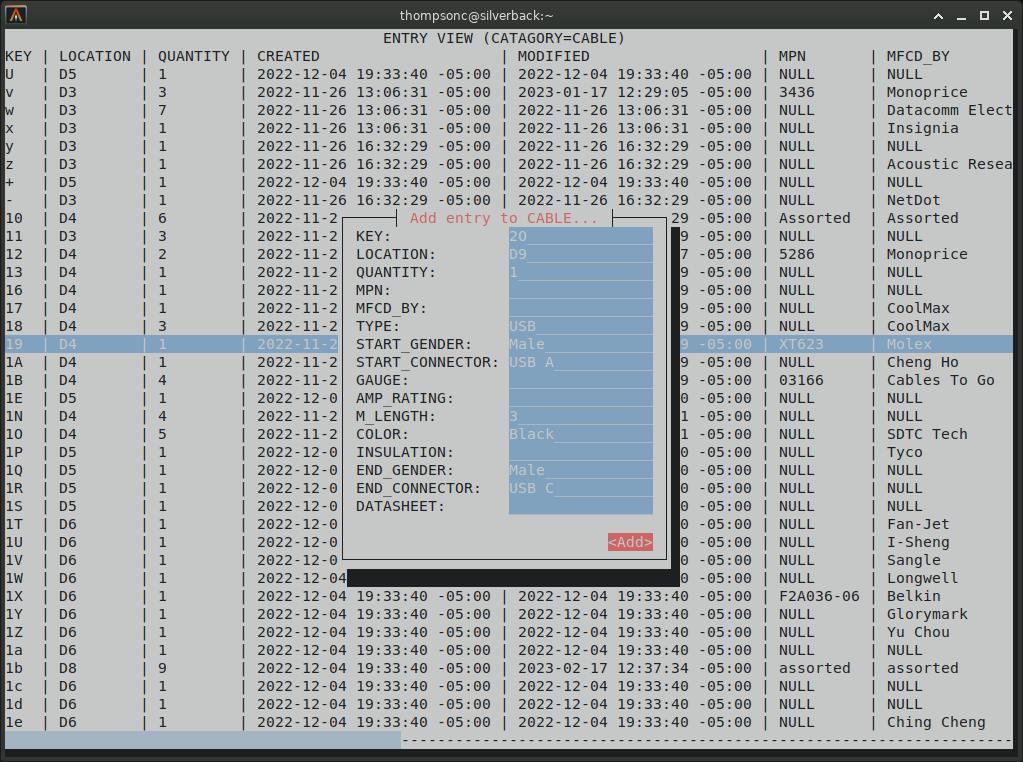
#### Add Entry Mode
In this mode you are presented with a dialog to add an entry. There are many
fields presented each correlating with the ones specified when you created your
catagory, with the addition of 3 more mandatory ones: **key**, **location**, and **quantity**.
**key** is the base64 key you're going to assign this entry, and should be derived
from the label you printed out and plan to attach to whatever you're inventorying.
**location** is the physical location of the entry, and should be something like "Drawer 1" or "Shelf 10".
**quantity** is the integer quantity of an entry, and should describe how many of a certain
item you have(this is not a real so no halves or decimals are allowed).
After filling out all of the mandatory fields, and the fields you desire to fill
out, you can select the add button to add the entry. All non-filled out fields will
be set to NULL and can be modified at a later date
#### Find Mode
In this mode you are presented with a dialog that can be quickly used to find
a specific entry given you know it's key. This can be useful if you want to find
out something specific about something in your inventory, or if you need to delete it.
Simply type in the entry's key in the key field and select the find button to find the entry.
#### Filter Mode
In this mode you are presented with a dialog used to apply constraints and "filter"
out any entries you don't want to see. You just need to select the field to constrain,
the type of comparison to make, and the value you wish to compare the entries to.
Once you have your constraint filled out you select the filter button and your
constraint should be applied and visible at the top of the screen.
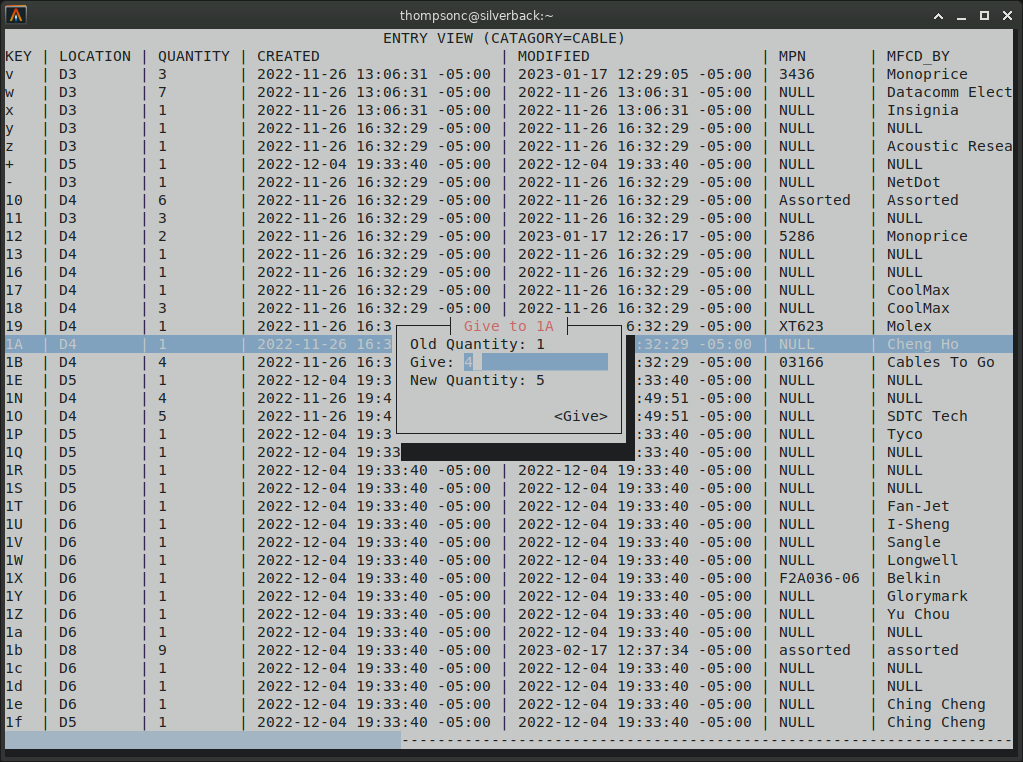
#### Give Mode
In this mode you are presented with a dialog that allows you to add to the quantity
of the currently selected entry.
Simply adjust the amount you want to add to the quantity and select the give button.
#### Take Mode
In this mode you are presented with a dialog that allows you to subtract from the quantity
of the currently selected entry.
Simply adjust the amount you want to subtract from the quantity and select the take button.
#### Modify Mode
In this mode you are presented with a dialog that allows you to modify the selected entry.
You are presented with all the fields of the entry filled out with what they currently are,
and you can change them to what you wish them to be. You can also clear a field and
make it "NULL" by simply turning it blank
Once you've modified the fields desired simply select the modify button.
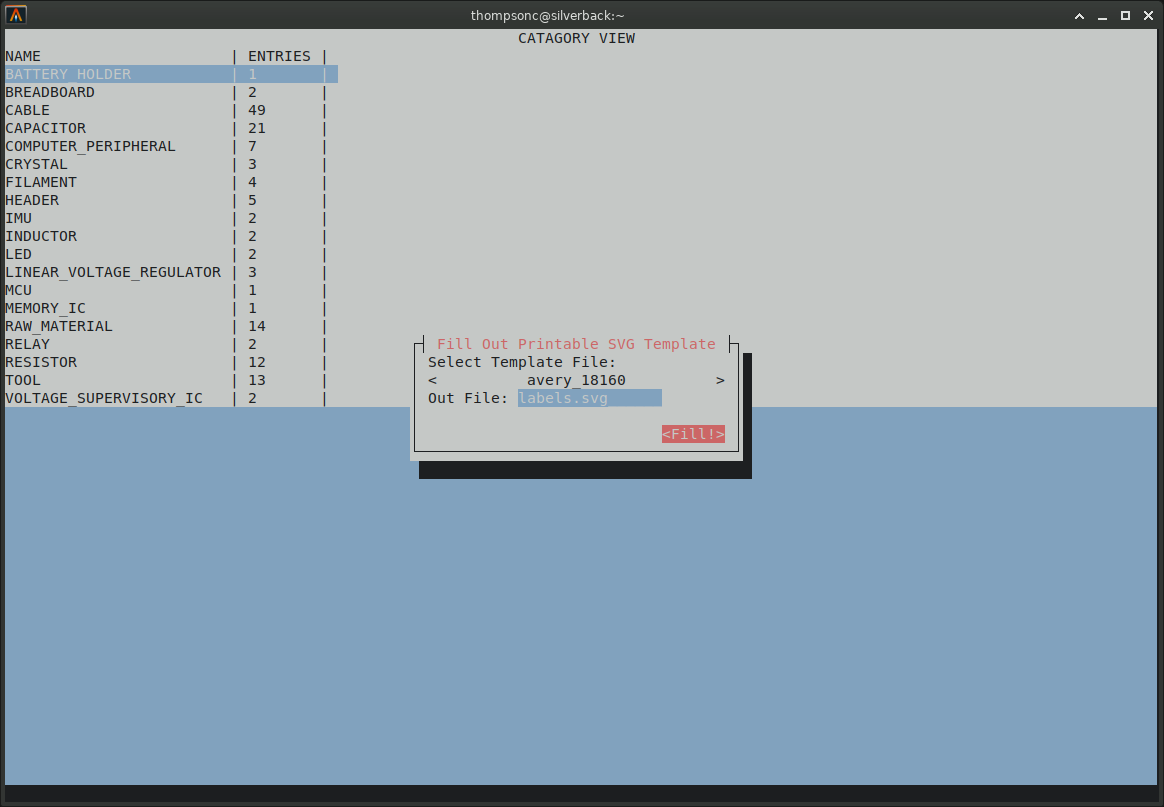
#### Fill Template Mode
In this mode you are presented with a dialog which allows you to create a printable
sheet of labels from either one of the built in templates or a template in your template directory.
Simply select the template you want and specify the name of the file you wish to write to.
Note that the only supported output file type is SVG
Once everything is filled out you can select the fill template button.
#### Yank Entry Mode
This mode is similar to add entry mode except all the fields are filled out
with the fields of the selected entry, minus the key which must be provided.
This is useful if you are adding a lot of similar items, like many different
lengths of M3 screws for example.
### CLI
The CLI is for the rare instance that a TUI isn't available or the odd case that
you absolutely despise TUIs, it is functionally very similar to the TUI though
### CLI Subcommands
#### tui
Starts the TUI, see TUI above
#### add
Adds an entry to a specified catagory. Has 4 mandatory options along with requiring you to specify the fields you wish to set in the format `field=value`
-c, --catagory <CATAGORY> The catagory to add the entry to.
-k, --key <KEY> The key of the entry to add.
-l, --location <LOCATION> The physical location of the entry.
-q, --quantity <QUANTITY> The quantity of the entry.
#### add_catagory
Adds a catagory to the database. Has 1 mandatory option along with requiring you to specify the fields you wish to set in the format `field=type`.
Type being either `t` for text, `i` for integer, or `r` for real.
-c, --catagory <CATAGORY> The name of the catagory
#### delete
Deletes an entry given it's base64 key
#### fill_template
Fills out an svg template to the given svg file using either a built-in template or a gz-compressed svg template file
-b, --builtin <BUILTIN> Use a builtin template
-i, --infile <IN> GZ-SVG template to read and fill out
#### find
Finds an entry given it's base64 key
#### give
Adds the given number to an entry's quantity using it's base64 key
-k, --key <KEY> The key of the entry to give to
#### list
Lists all the entries in a specified catagory, I recommend piping the output of
this through the less command.
-c, --catagory <CATAOGRY> The catagory to list the contents of
#### list_builtin_templates
Lists all the built-in label templates for use with the fill_template command
#### list_catagories
Lists all the catagories in your pinv database
#### modify
Modifies all the fields specified in an entry specified with it's base64 key. Fields use the `field=value` format.
-k, --key <KEY> The key of the entry to modify.
#### take
Subtracts the given number from an entry's quantity using it's base64 key
-k, --key <KEY> The key of the entry to give to
## Will Future Updates Break My Database?
While in a very early version, I already personally have a lot of data stored in
my pinv so I will **guarantee** all pinv versions to be at the very least backwards
compatable with previously made databases.
## Images
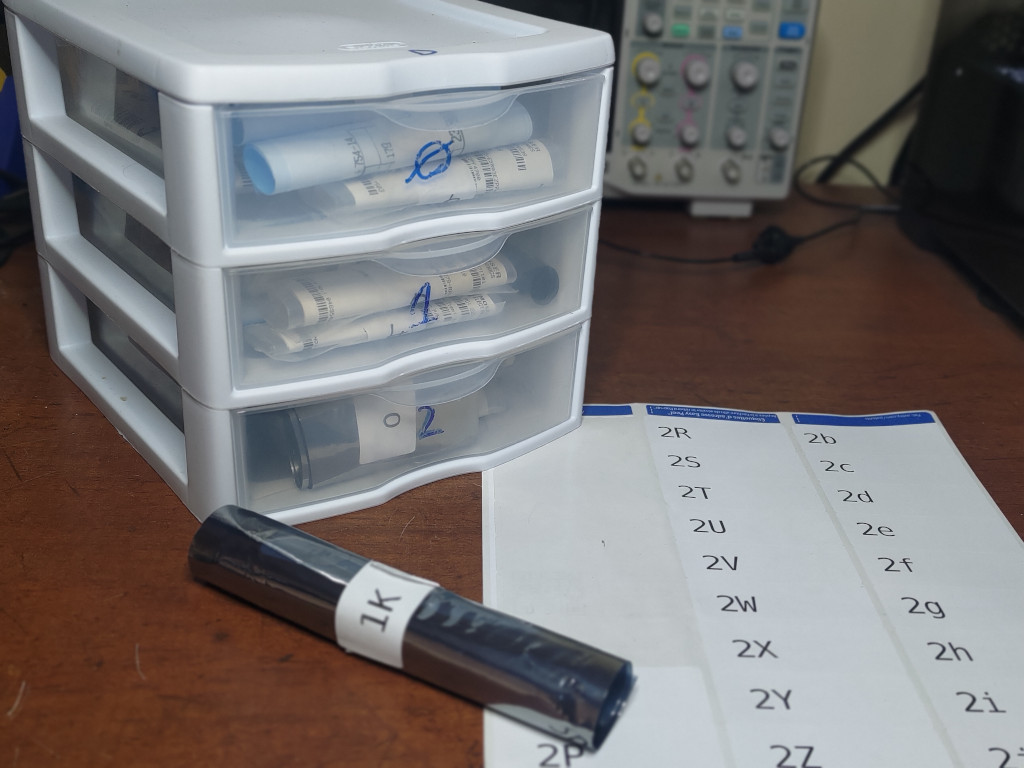
#### Me using printed labels to organise electrical components.
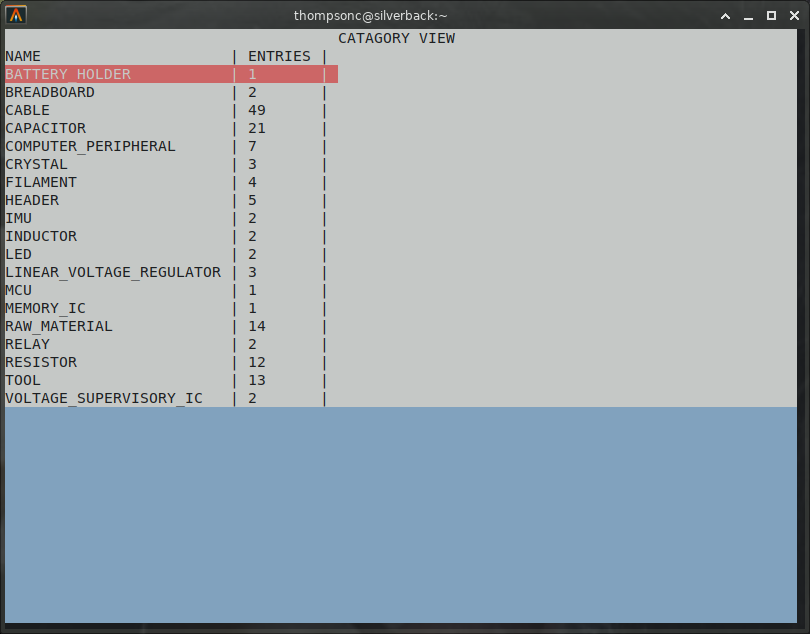
#### In catagory view.
#### Filling out a template to be printed.
#### Adding an entry to the cable catagory.
#### Adding to the quantity of an entry.