
🍓 ichigo 🍓





A CLI HTTP client. Store named request configs in your project or globally, then run them by name.
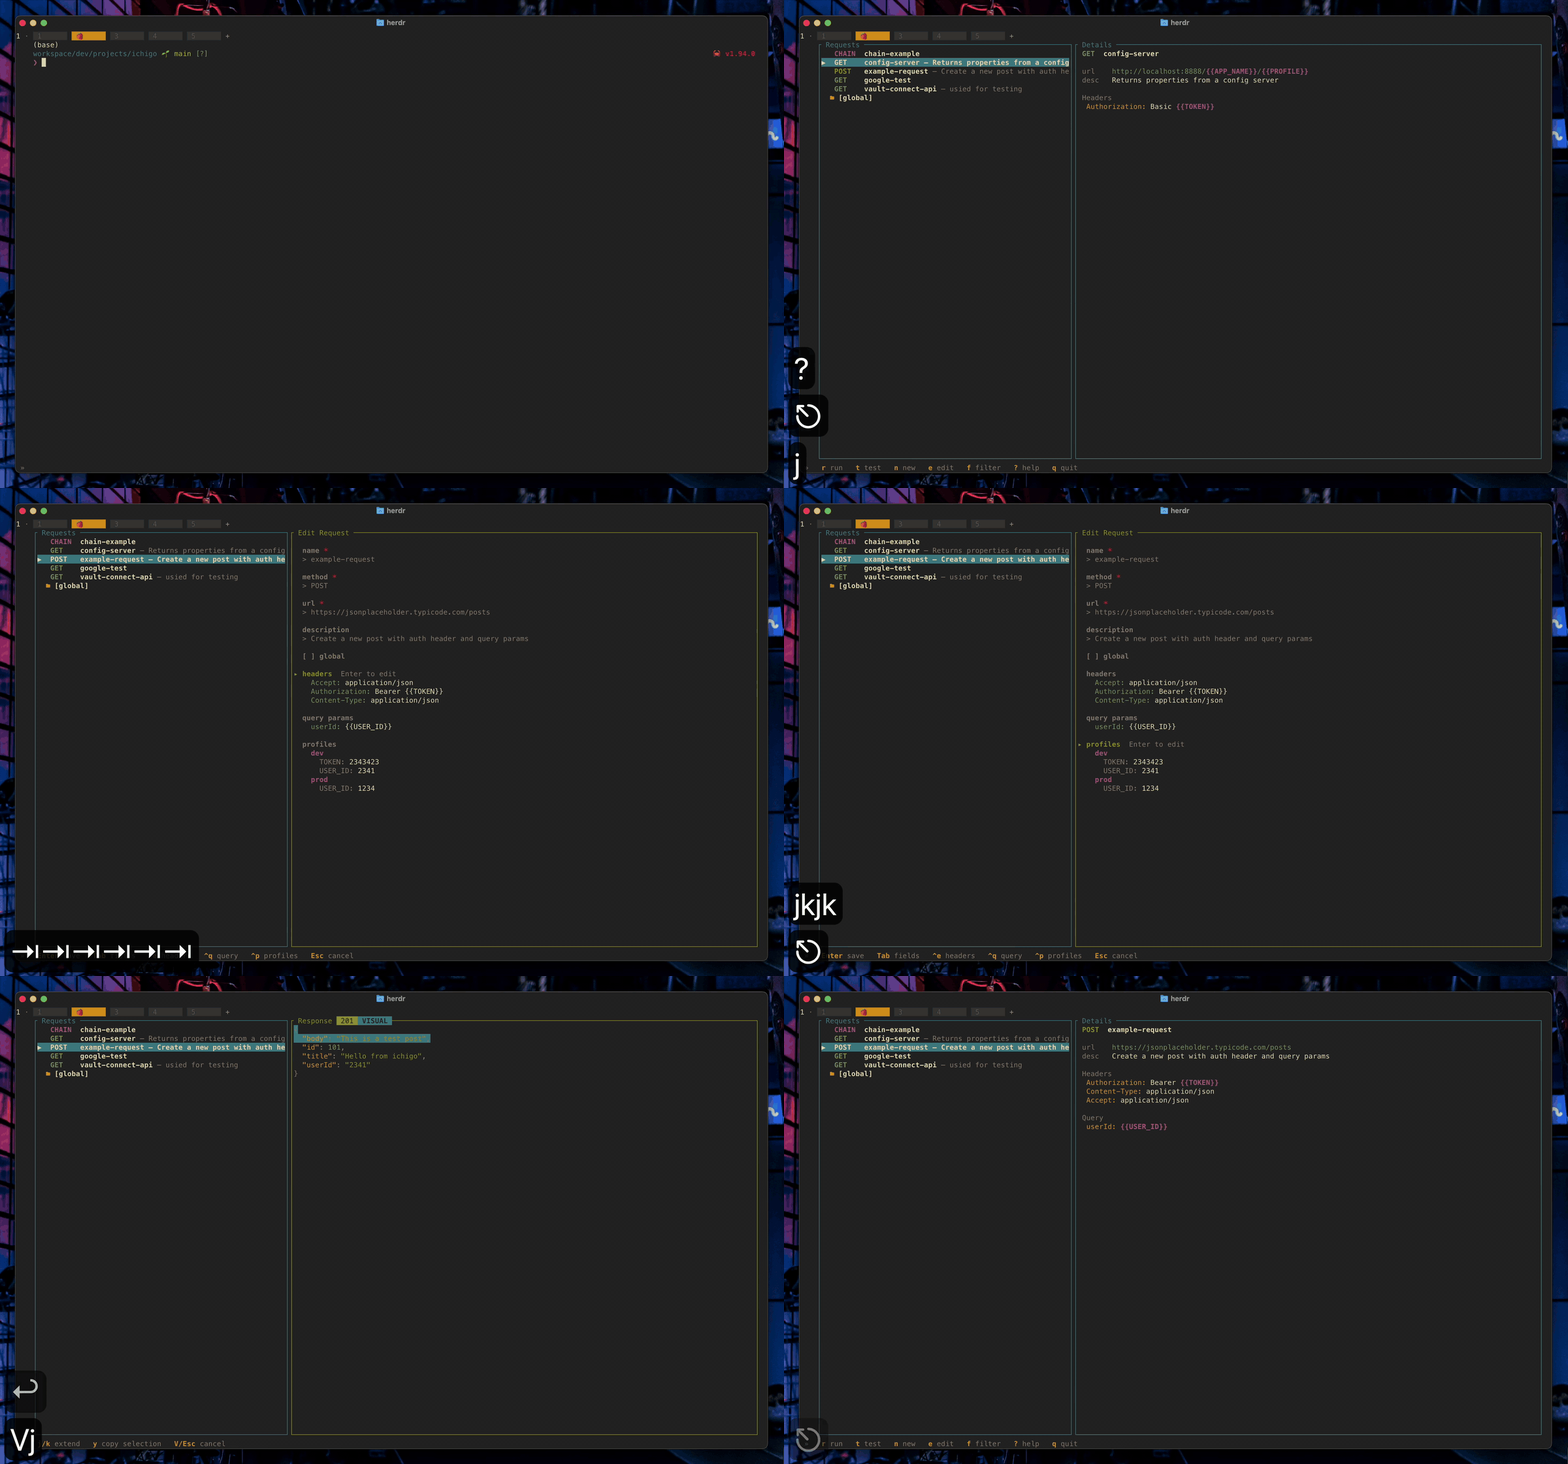
(click for the full-resolution video)
Installation
Via shell script (macOS/Linux):
|
Via PowerShell (Windows):
powershell -ExecutionPolicy ByPass -c "irm https://github.com/playsthisgame/ichigo/releases/latest/download/ichigo-installer.ps1 | iex"
Via Cargo:
Config files
Configs live in one of two places:
.ichigo/— project-local (checked into git alongside your code)~/.config/ichigo/— global (available everywhere)
When a name exists in both, the local one wins.
Your own preferences are separate: ~/.config/ichigo/config.toml. It sits in
the same directory but is TOML, so it is never mistaken for a request. See
Configuring ichigo.
Commands
ichigo new <name>              Create a new request config
ichigo run <name>              Execute a request
ichigo list                    List all configs
ichigo show <name>             Print a config file
ichigo delete <name>           Delete a config
ichigo test <name>             Run a load test
ichigo copy <name> <new-name>  Duplicate a config under a new name
new
Flags:
-m, --method— HTTP method (default:GET)-u, --url— target URL-g, --global— save to~/.config/ichigo/instead of.ichigo/--from-curl— build the request from a cURL command read from stdin
Creating a request from a cURL command
Anything that hands you a cURL command — a browser's "Copy as cURL", an API doc, a teammate's bug report — can become a config directly:
|
The command is read from stdin rather than taken as an argument, so you never
have to re-escape its quotes. --from-curl cannot be combined with --method
or --url, since the command already supplies both.
What the parser does with each flag:
| Mapped | --url, -X/--request, -H/--header, -d/--data/--data-raw/--data-ascii/--data-binary, --data-urlencode, --json, -G/--get, -I/--head, -u/--user, -b/--cookie, -A/--user-agent, -e/--referer |
| Ignored | -s, -S, -v, -i, -k, -L, -f, -o, -w, --compressed, --max-time, --connect-timeout, --retry, --limit-rate — these describe how curl behaves, not what it sends |
| Refused | -F/--form (multipart), @file data references, and any flag not listed above |
An unrecognized flag is an error naming the flag, not a silent skip: a config that quietly drops half of what you pasted is worse than one that refuses to be created. If ichigo refuses a flag you need, the command is unchanged in your clipboard.
Some details worth knowing:
- The method follows curl's own rules — an explicit
-Xwins,-Imeans HEAD, a body means POST, everything else is GET. - A query string on the URL is split into the
querymap. If a key repeats (?tag=a&tag=b), the query stays on the URL instead, since the map holds one value per key. - A
Content-Typeheader becomes the body'scontent_type. A body with no content type gets curl's default,application/x-www-form-urlencoded. --compressedis dropped rather than stored as anAccept-Encodingheader — ichigo's HTTP client negotiates encoding itself, so storing the header would make the config claim something it does not do.-u user:passbecomes theAuthorization: Basic …header curl would send.
An imported config holds the literal values from the command, including whatever token or cookie was in it. Before committing
.ichigo/to a repo, replace those with{{VAR}}placeholders and put the real values in a profile or an environment variable.
run
Variables replace {{PLACEHOLDER}} tokens anywhere in the config (url, headers, query, body). They are resolved in this order: --var flags → environment variables.
Flags:
-v, --var KEY=VALUE— set a variable--verbose— print the full response (status, headers, body)-p, --profile— use a named profile (see Profiles)
Chaining requests
A chain config runs multiple requests in sequence, passing extracted values from one step into the next. Only the final step's response is printed; use --verbose to see all steps.
Chain configs are detected automatically by the presence of a steps: key — no separate command needed.
copy
Duplicates an existing config under a new name. Useful for creating variants of a request (e.g. a prod and dev version of the same endpoint).
Flags:
-g, --global— look for the source in~/.config/ichigo/and save the copy there too
Without --global, both the source and the copy are in .ichigo/. With --global, both are in ~/.config/ichigo/. The copy command will error if the source does not exist or if a config with the new name already exists.
test
Runs the request N times and reports status code counts and timing stats.
Flags:
-v, --var KEY=VALUE— set a variable-i, --iter— number of iterations-p, --profile— use a named profile
tui
Opens an interactive terminal UI for browsing, running, and load-testing your configs.
Keybindings:
| Key | Action |
|---|---|
? |
Show the full keymap |
j / k |
Navigate list |
gg / G |
Jump to top / bottom |
| Space | Expand / collapse a folder |
f |
Filter the list |
r / Enter |
Run selected request |
t |
Load-test selected request |
y |
Copy selected request as a cURL command |
i |
Import a pasted cURL command as a new request |
n / e / c |
New / edit / clone a request |
d |
Delete selected request |
R |
Refresh the config list from disk |
q |
Quit |
| Esc | Go back |
The hint line at the bottom of the screen carries only the handful of keys you
reach for most; press ? for the full keymap, grouped by what it does. Any key
dismisses it.
Resizing the panes. Drag the divider between the list and the detail pane
with the mouse; it works in every mode, so you can widen the detail pane while a
response or a form is up. The width a session starts at is
layout.split_pct — a drag is not saved back to it.
The TUI is meant to be left open. Every run and load test re-reads the config file from disk first, so edits you make in another terminal — rotating a token in a profile, adding a header, changing a URL — take effect on the next run with no restart. Press R when you have created, renamed, or deleted config files on disk and want them to show up in the list.
Editing text fields
Every form field in the TUI — a URL, a header value, a profile param — is a small vim-style editor rather than an append-only box.
Fields start in insert mode. Esc drops to normal mode, where the
usual motions work; a second Esc leaves the pane. The caret shows which mode
you are in: a thin bar between characters for insert, a block over a character
for normal.
| Key | Action |
|---|---|
| ← → , Home / End | Move the caret (either mode) |
| Backspace / Delete | Delete a character (either mode) |
h / l |
Left / right |
w / b / e |
Word forward / back / end (W B E skip punctuation) |
0 / ^ / $ |
Start of line / first non-blank / end |
i / a / I / A |
Insert before / after the caret, at the start / end |
x / s |
Delete the character under the caret, with / without inserting |
D / C / S |
Delete to end of line, change to end of line, change the line |
u |
Undo the last change |
u steps back one change at a time, not one keystroke: everything typed
between entering insert mode and leaving it undoes together, so one u reverses
the whole URL you just typed rather than its last character. The history belongs
to the field, and moving focus starts a new one — Tab away and back and there is
nothing left to undo. There is no redo.
If you map jk (or similar) to Esc in vim, see Configuring ichigo.
Copying part of a response
The response pane has a cursor line, so you can take just the lines you want without fighting your terminal's text selection:
| Key | Action |
|---|---|
j / k |
Move the cursor (the view scrolls to follow) |
y |
Copy the cursor line |
V |
Start a line selection; j/k extend it, y copies it |
| Esc | Cancel the selection (again to leave the pane) |
f |
Filter to matching lines |
c |
Copy everything the pane is showing |
Copying this way beats dragging with the mouse: a terminal's selection is
linear, so a drag that spans more than one row also takes the request list and
the pane borders on the rows in between. y copies the lines themselves.
c copies what the pane shows. With a filter active that is the matching
lines only, which is often the quickest route to a couple of scattered
fields — filter to secret and c gives you both token lines with nothing
in between. Clearing the filter puts the cursor back at the top, since the
line it pointed at may no longer be on screen.
Pressing y in the request list turns the selected request into a cURL command and copies it to the clipboard. It runs the same profile picker and variable prompts as a normal run, so the command it produces carries the resolved values — the profile's real token, not {{TOKEN}}. The command is shown before it is copied, and c re-copies it. Chains cannot be copied this way: a chain feeds values extracted from one step into the next, which a single cURL command has no way to express.
The generated command contains your real credentials. That is what makes it useful, and also what makes it unsafe to paste into a public issue, a pull request, or a shared log. Redact before sharing.
Copying uses whichever clipboard tool is available, tried in order: pbcopy (macOS), wl-copy (Wayland), xclip, then xsel (X11). If none is installed, the TUI says so rather than failing silently.
Pressing i does the reverse: it opens a pane you paste a cURL command into.
Press Ctrl+s to import it, and the new-request form opens with the method,
URL, headers, query, and body already filled in — you supply the name, and
nothing is written until you save. Enter inserts a newline rather than
importing, so a multi-line paste works even in terminals that do not support
bracketed paste. If the command uses something ichigo cannot store, the pane
reports which flag and keeps your text so you can edit it. The
--from-curl section covers exactly
which flags are mapped, ignored, and refused.
If the selected request has profiles, a profile picker appears before the variable input screen. Use j/k to choose a profile (or (no profile) to skip), then press Enter. Any variables not covered by the profile can still be filled in manually.
Config format
name: create-user
method: POST
url: https://api.example.com/users
description: "Create a new user"

headers:
  Authorization: "Bearer {{TOKEN}}"
  Accept: application/json

query:
  version: "2"

body:
  content_type: application/json
  data: |
    {
      "name": "{{USER_NAME}}"
    }
Chain config format
Use steps: instead of a top-level request. Each step is a full request config, and extract: maps variable names to JSON paths in the response. Extracted values are available as {{VAR}} in all subsequent steps.
name: login-and-fetch
steps:
  - name: login
    method: POST
    url: https://api.example.com/auth/login
    body:
      content_type: application/json
      data: |
        {
          "username": "{{USERNAME}}",
          "password": "{{PASSWORD}}"
        }
    extract:
      TOKEN: $.token

  - name: fetch-profile
    method: GET
    url: https://api.example.com/me
    headers:
      Authorization: "Bearer {{TOKEN}}"
Profiles
Profiles let you bundle a set of variable values under a name, so you can switch between environments (e.g. dev vs staging vs prod) without retyping vars each time.
name: create-user
method: POST
url: https://{{HOST}}/users
headers:
  Authorization: "Bearer {{TOKEN}}"
body:
  content_type: application/json
  data: |
    {
      "name": "{{USER_NAME}}"
    }

profiles:
  - name: dev
    params:
      HOST: localhost:8080
      TOKEN: dev-token-123

  - name: staging
    params:
      HOST: staging.example.com
      TOKEN: stg-token-456
Run with a profile from the CLI:
Any {{PLACEHOLDER}} not covered by the chosen profile is still resolved from --var flags or environment variables as normal. In the TUI, a profile picker appears automatically when profiles are present — pick one (or skip) and fill in any remaining variables interactively.
The request form
n opens a blank request form and e opens the selected one. Tab and
Shift-Tab walk it, and the walk covers more than the four text fields:
| Row | Enter does |
|---|---|
name, method, url, description |
Save the request |
[ ] global |
Toggle between .ichigo/ and ~/.config/ichigo/ |
headers |
Open the headers pane |
query params |
Open the query params pane |
profiles |
Open the profiles pane |
So every part of a request is reachable by tabbing through the form — there is
no chord to know in advance. Ctrl+g, Ctrl+e, Ctrl+q, and Ctrl+p still
jump straight to those four from anywhere in the form.
The four text fields are editors (see Editing text fields), which is why Esc takes two presses there — the first leaves insert mode, the second leaves the form. On the four rows below them there is no text to edit, so one Esc leaves.
Editing headers and query params in the TUI
Headers and query params are edited in the same pane. Tab to headers or
query params in the request form and press Enter, or use Ctrl+e and
Ctrl+q from anywhere in the form:
| Key | Action |
|---|---|
| Tab / Shift-Tab | Move between name and value fields |
Ctrl+a |
Add a row |
Ctrl+d |
Remove the row under the cursor |
| Enter | Apply to the request |
| Esc | Discard the edits |
Ctrl+halso opens headers, but only in terminals that send it. Many terminals, tmux configs, and shells bind Ctrl+H to backward-delete-char and send a plain Backspace instead, in which case the key just deletes a character. Tab to the row and press Enter if you want the path nothing can intercept.
Applying only updates the request in memory — Enter on the request form is what writes the file, so Esc out of that form drops the changes too.
Blank-named rows are dropped rather than treated as an error, so a row you add and then think better of costs nothing. Names and values are trimmed.
The two panes differ in one rule, and it follows the protocol rather than the
UI. Two headers with the same name are refused without regard to case: HTTP
treats Accept and accept as one header, so keeping both would mean sending
whichever won a coin toss. Two query params are compared exactly, so page
and Page are different params and both are kept — a query key means whatever
the server says it means, and refusing that pair would reject a request that is
perfectly legal to send. An exact repeat is still refused, since only one of the
two could survive.
If the request has a body, a Content-Type header is stored as the body's
content_type rather than as a header — ichigo derives the header from the body
when it sends, and holding both would put it on the wire twice. That rule is
headers-only: a query param that happens to be named Content-Type is just a
param.
Editing profiles in the TUI
Tab to profiles in the request form and press Enter, or press Ctrl+p from
anywhere in the form:
| Key | Action |
|---|---|
j / k |
Move between profiles |
| Enter | Edit the selected profile (or + new profile to add one) |
n |
Add a profile |
d |
Delete the selected profile |
| Esc | Back to the request form |
Params appear under whichever profile is selected, so a request with several
environments does not print every token at once. Inside a profile, Tab moves
between fields and Ctrl+a adds a param.
Profile changes are held with the rest of the request until you save it: Esc
returns you to the request form, and Enter there writes the file. Escaping
out of that form discards the profile edits along with everything else, so you
can back out of a change you started by mistake. Two profiles cannot share a
name — the second is refused rather than saved, since a duplicate would be
unreachable from both the picker and --profile.
Profile values are re-read from the file every time you run, so a token you rotate in the YAML is picked up on the next run of a long-lived TUI session. Values resolved from environment variables are not: a process cannot see exports its parent shell makes after launch, so an env-sourced token stays stale until you restart ichigo. Put values that rotate in a profile.
Configuring ichigo
Your preferences live at ~/.config/ichigo/config.toml — TOML, unlike the
requests themselves, so the two can share a directory without ever being
confused for one another. The file is optional, as is every key in it, and it is
global only: there is no project-local override, since these are preferences
about how you type rather than about a project.
All options
Every option ichigo currently understands.
| Option | Type | Default | What it does |
|---|---|---|---|
keys.insert_escape |
string, exactly two characters | unset — Esc only |
A two-key sequence that leaves insert mode in a TUI text field, the equivalent of vim's inoremap jk <Esc>. See Editing text fields. |
layout.split_pct |
integer, 15–85 | 35 |
The request list's share of the TUI width, as a percentage. The rest goes to the detail pane. |
A complete file, with every option set:
[]
= "jk"
[]
= 35
Any option you leave out keeps its default, and an empty file — or no file at all — means every default. A section header whose options you have all omitted can be left out too.
keys.insert_escape
The sequence must be exactly two characters; ichigo refuses anything else rather
than guessing. The first character is typed into the field as normal and
un-typed when the second completes the sequence within a second — so j, a
pause to think, then k leaves you with a literal jk, the same as vim's
timeoutlen. Typing jk quickly does escape, which is why the usual advice
is to pick a digraph you never type.
layout.split_pct
The TUI is two panes: the request list on the left, everything else on the
right. split_pct is the list's share of the width, so a smaller number gives
more room to responses and forms:
[]
= 25 # a narrow list, a wide detail pane
It is a percentage rather than a column count, so the same file means the same layout on a laptop and on a wide monitor, and the ratio holds when you resize the terminal. Values outside 15–85 are refused rather than quietly clamped — below that either pane has room for little more than its own borders.
You can also drag the divider with the mouse at any time, in any mode. That
is a per-session adjustment: it starts from split_pct and is not written back
to the file, so widening the detail pane to read one long response does not
silently become your permanent setting. Set the option for the layout you want
every session to open with, and drag when a particular response needs the room.
Because the TUI captures the mouse to do this, your terminal's own click-drag
text selection is unavailable while ichigo is running. Most terminals still give
it to you with Shift held down (Option on macOS), and the response
pane's own V/y copy works regardless.
When the file is wrong
Unknown keys are an error, not a shrug — insert_esc will not silently do
nothing while you wonder why your keymap is dead:
Config: Invalid TOML in ~/.config/ichigo/config.toml: unknown field `insert_esc`,
expected `insert_escape` for key `keys` at line 1 column 1
The same goes for a value ichigo cannot use, such as a sequence of the wrong length. Either way the TUI opens on the message and runs on defaults; press Esc to carry on with them. One consequence worth knowing: because unknown keys are refused, a file written for a newer ichigo will not load on an older one.
Preferences that are not in this file
Nerd Font icons in the TUI are detected from your terminal, and overridden with an environment variable rather than a config key:
ICHIGO_ICONS=1 ICHIGO_ICONS=0 Unset, ichigo turns them on for terminals known to ship a Nerd Font (Kitty, WezTerm, Ghostty, iTerm2), including through tmux.
Shell completions
ichigo can generate a completion script so that pressing Tab autocompletes config names:
# → config-server-dev config-server-prod
The completions resolve config names live from .ichigo/ and ~/.config/ichigo/, so new configs appear automatically without any extra setup.
Zsh
Add this line to your ~/.zshrc:
Powerlevel10k users: place this line after the instant prompt block at the top of your
.zshrc.
Bash
Add this line to your ~/.bashrc:
Fish
Add this line to ~/.config/fish/config.fish:
ichigo completions fish | source
After adding the line, open a new terminal (or source the file) and tab completion will be active.