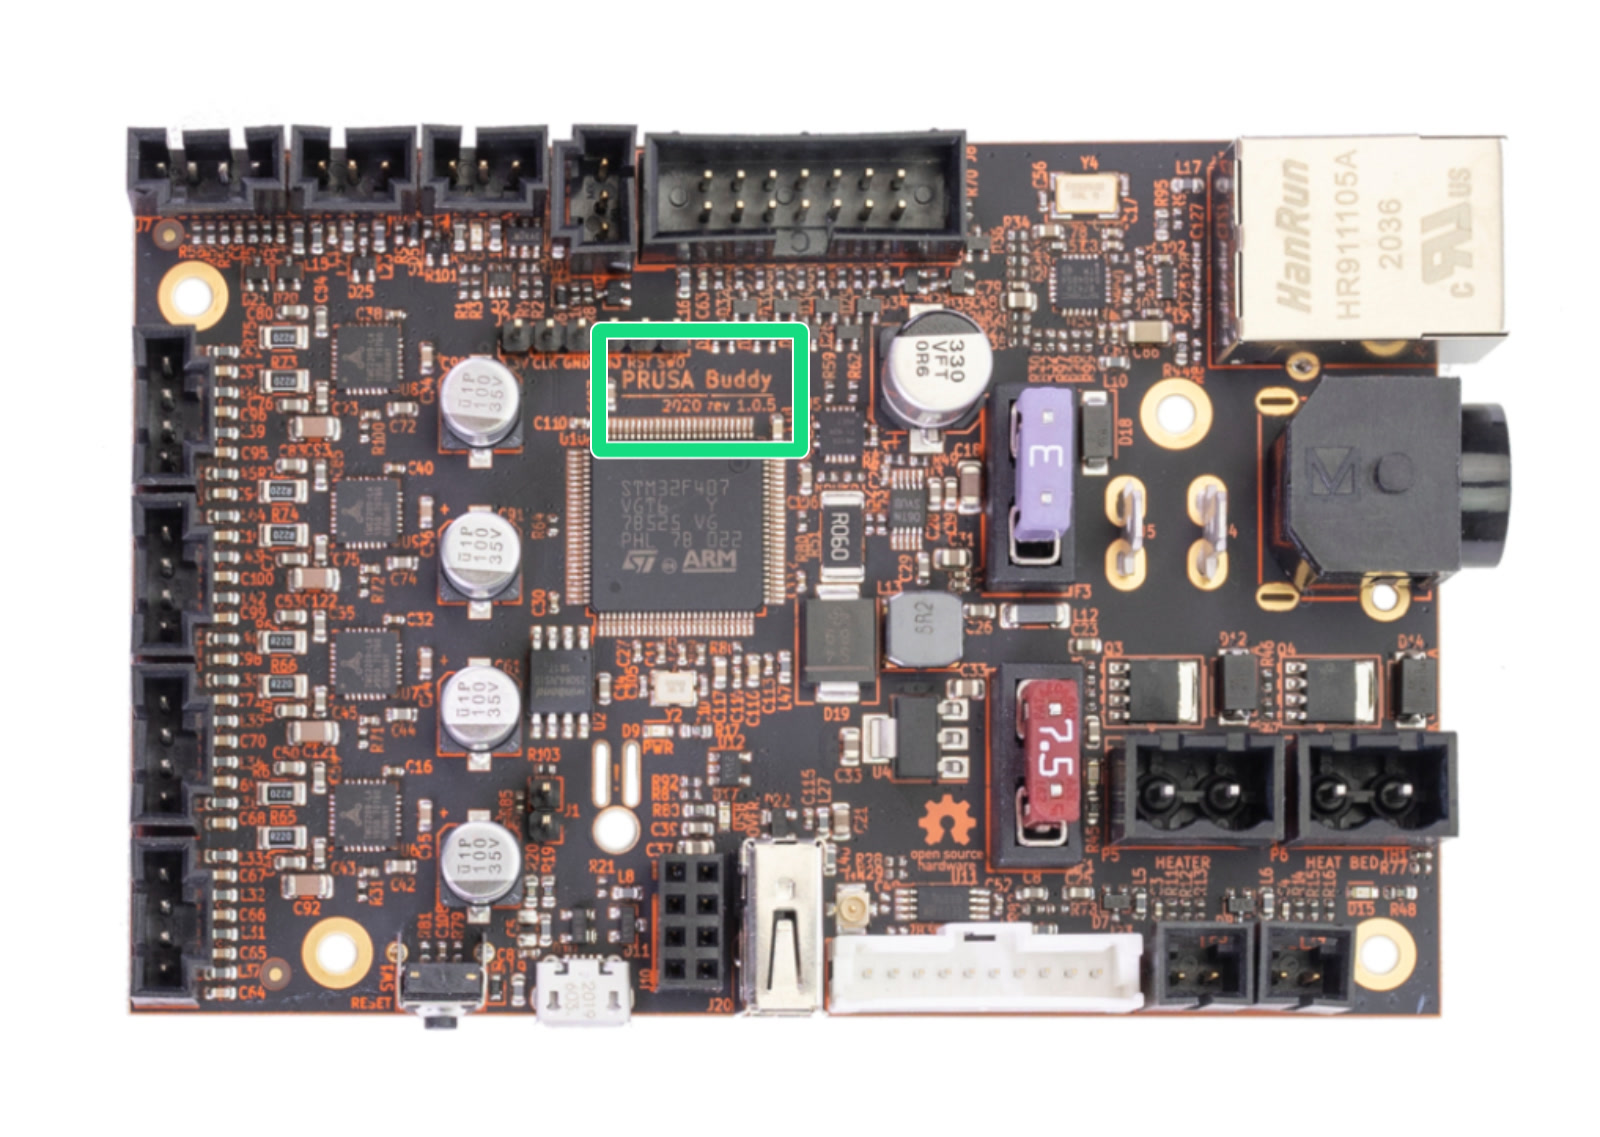
A [Board Support Package (BSP)](https://en.wikipedia.org/wiki/Board_support_package) for the Prusa Buddy board that powers [Prusa's](https://www.prusa3d.com/) Mini Additive Manufacturing (AM) machine (thank you for keeping the software/hardware docs open so I could make this happen!). I have had a great time implementing the board in Rust and against the [Embassy](https://embassy.dev/) framework that provides an async runtime for embedded devices.
# Implemented
- 3 x Thermistors (Bed, Board and Hotend)
- Filament Sensor
- LCD Display
- Ethernet
- Rotary Encoder
- Rotary Button
- Stepper Motor Drivers (X, Y, Z, E0)
- Bed Power Monitor
- PINDA sensor
- Flash chip
- EEPROM chip
- Bed and Hotend Heaters
- 2 x Fans
- Buzzer
## TODO
- USBHost and Mass Storage
# Starting a project with the BSP
## Pre-requisites
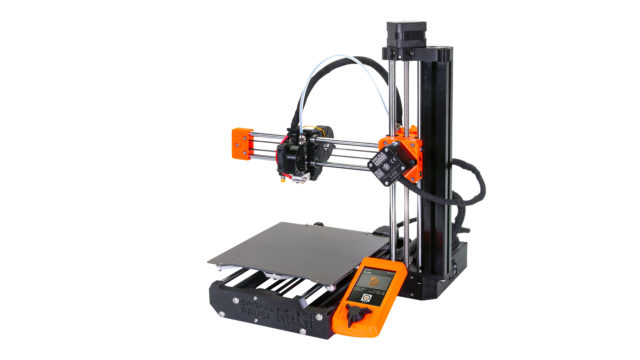
Before we start, we need to have some kit. I used a Prusa MINI which features the Buddy Board and the majority of the components that the board supports (there are some headers for expansions boards and additional connectivity). I am aware of a software-based QEMU emulator of the MINI printer ([MINI404](https://github.com/vintagepc/MINI404)). I haven't tried it out but it may be useful for people who haven't got access to a physical buddy board.
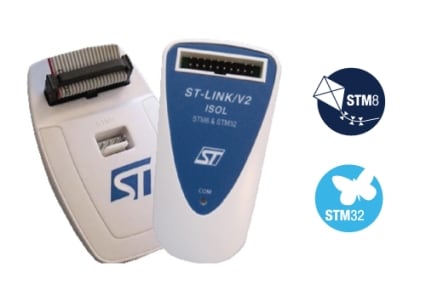
I also purchased an [ST-LINK/V2](https://www.st.com/en/development-tools/st-link-v2.html) in order to connect to and flash the board with code we will be writing as well as providing an RTT link that will enable us to print log messages to the terminal so we can check what is happening.
You need to install [Rust](https://www.rust-lang.org/) and [probe-rs](https://probe.rs/). Rust is the programming language and `probe-rs` provides the tools so we can communicate to the board via our ST-LINK/V2. Please go to their websites and follow their installation instructions. Make sure you follow `probe-rs`'s [setup process](https://probe.rs/docs/getting-started/probe-setup/) so your platform can communicate with the microcontroller device.
## Breaking the Appendix
To be able to flash our custom firmware onto the buddy board, we need to break the [boards appendix](https://help.prusa3d.com/article/flashing-custom-firmware-mini-mini_14). This
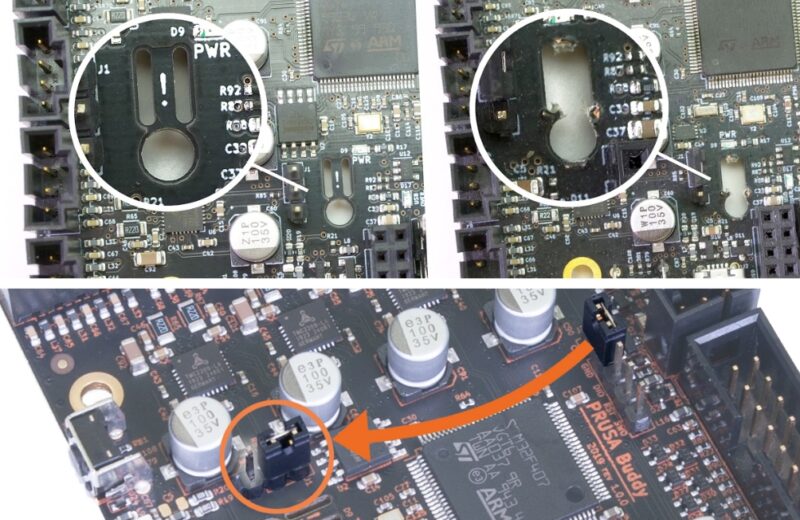
The image shows moving a jumper to a new location. Mine did not have this jumper so I simply used a small screwdriver to short the two pins so the board enters a state where it will accept new firmware flashed using the SWD interface, which will connect to now using the ST-LINK/V2.
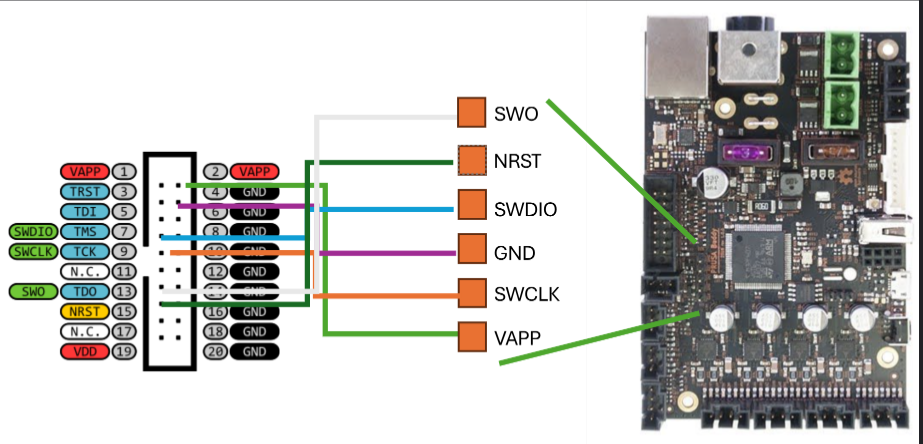
### ST-LINK/V2 wiring
The ST-LINK/V2 connects the PC to the buddy board. The figure below shows the necessary wiring to create the SWD link the `probe-rs` will use the write our code to the device and to provide logging through RTT so we can interrogate what is happening through the terminal.
## Adding some configuration
Now we need to configure the repo so that Rust is made aware that we're building the application for an embedded device and a specific embedded device for that matter - an STM32 microcontroller variant called STM32F407VG. You can see this written on the top of the microcontroller chip on the board.
First, create a new file at the directory root called `rust-toolchain.toml` and add the following.
```toml
[toolchain]
components = ["rust-src", "rustfmt"]
targets = ["thumbv7em-none-eabi"]
```
This tells Rust which [toolchain](https://rust-lang.github.io/rustup/concepts/toolchains.html) it needs to use to compile the code. In our case, it is for an ARM microcontroller.
Next, create a `.cargo` folder and within that folder create a file named `config.toml` and add the following text.
```toml
[build]
target = "thumbv7em-none-eabi"
[target.'cfg(all(target_arch = "arm", target_os = "none"))']
runner = "probe-rs run --chip STM32F407VG"
rustflags = ["-C", "link-args=--nmagic -Tlink.x -Tdefmt.x"]
[env]
DEFMT_LOG = "info"
```
The `[build]` section details the target we're aiming this code for and matches the details in the `rust-toolchain.toml`. Note you could have projects that you may want to build for many platforms. In our case, it is only one. The `[target]` section provides some further configuration details on the specific chip architecture that we're compiling further and how to link the build files. The `[env]` provides some environment variables and in this case, we're configuring `defmt` (a package we will add in a moment) to print info level log messages via RTT to our PCs terminal.
## Editor config
You may also need to add some config to your code editor to inform rust-analyzer to check the code against the platform we're coding for. Otherwise, it will try and check against your PC's platform. I use [zed]() and needed to create a `.zed` folder with a `settings.json` file containing:
```json
{
"lsp": {
"rust-analyzer": {
"initialization_options": {
"cargo": {
"allTargets": false,
"target": "thumbv7em-none-eabi"
}
}
}
}
}
```
## Adding Some Crates
Now we need the crates that will help us write our code. In the `Config.toml` add the following:
```toml
[dependencies]
cortex-m-rt = "0.7.5"
defmt = "0.3.10"
defmt-rtt = "0.4.1"
embassy-stm32 = { version = "0.2.0", features = [
"defmt",
"stm32f407vg",
"memory-x",
"time-driver-tim4",
] }
embassy-executor = { version = "0.7.0", features = [
"task-arena-size-32768",
"arch-cortex-m",
"executor-thread",
"defmt",
] }
embassy-time = { version = "0.4.0", features = [
"defmt",
"defmt-timestamp-uptime",
"tick-hz-32_768",
] }
panic-probe = { version = "0.3.2", features = ["print-defmt"] }
embassy_buddy = { version = "0.0.2" }
[profile.release]
debug = 2
```
There are a fair few packages to take in so lets go through them one by one.
The [`cortex-m-rt`](https://docs.rs/cortex-m-rt/latest/cortex_m_rt/) provides the startup code and minimal runtime for our microcontroller. We do not interface with the package directly but is necessary for our code to function.
[`defmt`](https://defmt.ferrous-systems.com/) provides our logging functionality and `defmt-rtt` provides the ability to log through the rtt interface so we can print it to the terminal on our PC when we run the code on the device.
[`embassy-stm32`](https://docs.embassy.dev/embassy-stm32/git/stm32f407vg/index.html) provides the Hardware Abstraction Layer (HAL) for the STM32 chip family. The `defmt` features enables the HAL to log via defmt. The `stm32f407vg` feature enables the specific configuration of our chip. The `memory-x` provide the details of how the memory should ba laid out and flashed onto the chip. And the `time-driver-tim4` specifies which timer should be used to drive `embassy-time`. Microcontrollers have many timers to choose from and I have continued with the one used in the `embassy-stm32` examples and one that is not used by the peripherals on the board.
[`embassy-executor`](https://docs.embassy.dev/embassy-executor/git/std/index.html) handles the asynchronous runtime and how it executes. `task-arena-size-4096` is the size amount of memory we are allocating to our asynchronous tasks. `arch-cortex-m` specifies the architecture we're working with. `executor-thread` enables thread mode execution. And `defmt` for logging messages from within the crate.
[`embassy-time`](https://docs.rs/embassy-time/latest/embassy_time/) provides timekeeping for our runtime so we can provide delays and timeouts within our tasks. `defmt` feature is enabled for logging and `defmt-timestamp-uptime` gives us the uptime in each of our log messages. `tick-hz-32_768` is the tick rate for the timer. Effectively, how oftenthe executor polls the status of async tasks.
[`panic-probe`](https://docs.rs/panic-probe/latest/panic_probe/) saves the day when we encounter some undefined behaviour, halting the program and providing a backtrace of where the issue occurred. `print-defmt` gets it to print the message via defmt.
[`embassy-buddy`] is this crate which will configure the pins and provide interfaces for the components on or connected to the board.
And that's it for the getting started package list. The last element we've added is [`[profile.release]`](https://doc.rust-lang.org/cargo/reference/profiles.html) which provides config on the level of debug information when building the release version of the codebase.
## Configured folder structure
Ok, we're nearly there and your folder structure should look something like this:
```noplayground
.cargo
- config.toml
(.zed
- settings.toml)
src
- main.rs
.gitignore
Cargo.toml
README.md
rust-toolchain.toml
```
Now you can head over to the examples folder on GitHub and play with loading in and using some of the BSPs functionality.
# Examples
Examples can be found in the `examples` folder on GitHub. These can be run using:
```bash
cargo run --release --example board
```
or
```bash
cargo run --release --example board --features defmt
```
to see defmt info messages from the buddy builder.
# Support
Please consider supporting the crate by:
- Downloading and using the crate.
- Raising issues and improvements on GitHub.
- Recommending the crate to others.
- ⭐ the crate on GitHub.
- Sponsoring the [maintainer](https://github.com/sponsors/jamesgopsill).
# Who's using it
Well me for starters. My research is developing and studying decentalised trusted Artificial Intelligent (AI) agent networks. This crate is contributing to a reference model demonstrating how we can embed AIgents in manufacturing machines. The machines then join networks where they can broker work with one another an AIgents who are acting on behalf of jobs in the network. We have a network set up in our lab that handles our own job loads.
The trust element is required in order to prove that the AIgents are who they say they are. For example, the machine I am talking to is the machine I think it is and a job is coming from someone I know it is. We achieve this by using blockchain, self-soverign identities, verifiable credentials, smart contract, Hardware Unique Key (HUK) and One-Time Programming (OTP) technologies.
We have selected Rust as the language for the entire reference model stack oweing to its memory-safety, performance, and we can use it for embedded systems, desktop, webapp, and server-side applications.
# Contribute
Sure, send me a message.
# Shout-Outs and References
- Prusa and the opensource/hardware software reposoitories
- [Prusa Buddy Firmware](https://github.com/prusa3d/Prusa-Firmware-Buddy)
- [Prusa Buddy Board Documentation](https://github.com/prusa3d/Buddy-board-MINI-PCB)
- [Pusa BOM Documentation](https://github.com/prusa3d/Original-Prusa-MINI)
- The [Embassy](https://embassy.dev/) crate and all its examples.
- Youtubers showing me how to Rust.
- [Jon Gjengset](https://www.youtube.com/@jonhoo)
- [The Rusty Bits](https://www.youtube.com/@therustybits)
- [Floodplain](https://www.youtube.com/@floodplainnl)
- [TM2209 Datasheet](https://www.analog.com/media/en/technical-documentation/data-sheets/TMC2209_datasheet_rev1.08.pdf)
- [Embedded Rustacean Blog](https://www.theembeddedrustacean.com/)
# Flashing Original Firmware
So you've had a play and now you want your printer back as it was with the original firmware. Can we do it? Of course we can.
You will need to git clone the Buddy Firmware library:
```bash
git clone https://github.com/prusa3d/Prusa-Firmware-Buddy.git
```
And build the firmware for your printer. In my case this was the Prusa MINI. First create a python virtual environment in the directory.
```bash
python -m venv .venv
```
and activate it
```bash
source .venv\bin\activate
```
Then install the packages needed for the build process:
```bash
pip install -r requirements.txt
```
And then build your printers firmware.
```bash
python utils/build.py --preset mini --build-type release --bootloader no --skip-bootstrap
```
You can then use `probe-rs` to flash it over to the board as we have done with our Rust code. Assuming you're in the root of the buddy firmware directory, the command should look something like this:
```bash
probe-rs run --chip STM32F407VG ./build/mini_release_noboot/firmware
```
And you printer should come back to life as it was before. In fact, you can now easily go to any release of the buddy firmware and play around with the config files in their software. Happy days.