Expand description
Tundra provides a framework and utilities for creating interactive terminal applications with Ratatui.
Ratatui is a comprehensive library for creating singular user interfaces in the terminal, but lacks features for organizing larger applications — composed of several interfaces — and for receiving user data input.
Tundra aims to extend the functionality of Ratatui with utilities for:
- Defining application states.
- Managing the terminal environment and context.
- Displaying messages through modal dialogs.
- Receiving user input through input forms and fields.
Tundra is also highly extensible with tools to easily define your own dialogs and input fields.
It is not intended to be a replacement for or wrapper over Ratatui, nor the backend. Ratatui is still required to draw the user interface of each application state, and the backend is still required for low-level terminal operations.
§Getting Started
Add Tundra and Ratatui to the project dependencies, and note that the version of Ratatui used must be compatible with the one used by Tundra:
$ cargo add tundra ratatui@0.27Next, import the Tundra prelude, exposing symbols required in virtually all applications:
use tundra::prelude::*;§Basic Usage
First construct a context. This represents the underlying terminal, but has added RAII to automatically initialize and reset the terminal environment.
let ctx = Context::new()?;This context gets passed around between application states — allowing them to draw to the terminal.
Next, create an application state. For this example, we’ll create a state with a tally that increases
when the user presses up.
struct Tally {
    value: u32,
}
To define the event loop of the state, implement the State trait.
use ratatui::widgets::Paragraph;

impl State for Tally {
    type Result<T> = T;
    type Out = u32;
    type Global = ();

    fn draw(&self, frame: &mut Frame) {
        let widget = Paragraph::new(self.value.to_string());
        frame.render_widget(widget, frame.size());
    }

    fn input(mut self, key: KeyEvent, ctx: &mut Context) -> Signal<Self> {
        match key.code {
            KeyCode::Up    => self.value += 1,
            KeyCode::Enter => return Signal::Return(self.value),
            _ => (),
        }
        Signal::Continue(self)
    }
}
Some notes on the implementation:
Resultcan be used to specify what can go wrong when running the state — analogous to an error type but more flexible.Outis the type that is returned from the state once it’s done running.Globalcan be used to store a global value inside the context.drawis used to draw the user interface using Ratatui.inputis used to handle key press events. TheSignalreturn value indicates to the event loop when and what to return.
Our tally can now be ran using State::run.
// returns the value when the user presses enter (per our State::input)
let value: u32 = Tally{ value: 0 }.run(ctx);
There is not much boiler-plate in running this simple example, but for more complex states, a wrapper function that constructs and runs the state should be used.
pub fn tally(ctx: &mut Context) -> u32 {
    Tally{ value: 0 }.run(ctx)
}
This interface can now be used from other states to “transition” to the Tally state! For the sake of
argument, let’s create and run a new tally from within our existing tally whenever the user presses tab.
The current value will be multiplied with the value entered in the new tally (the “transitioned-to”
state).
fn input(mut self, key: KeyEvent, ctx: &mut Context) -> Signal<Self> {
    match key.code {
        KeyCode::Up    => self.value += 1,
        KeyCode::Tab   => self.value *= tally(ctx),
        KeyCode::Enter => return Signal::Return(self.value),
        _ => (),
    }
    Signal::Continue(self)
}
That’s all you need to get started! See the
tally example for the complete
code.
§Modal Dialogs
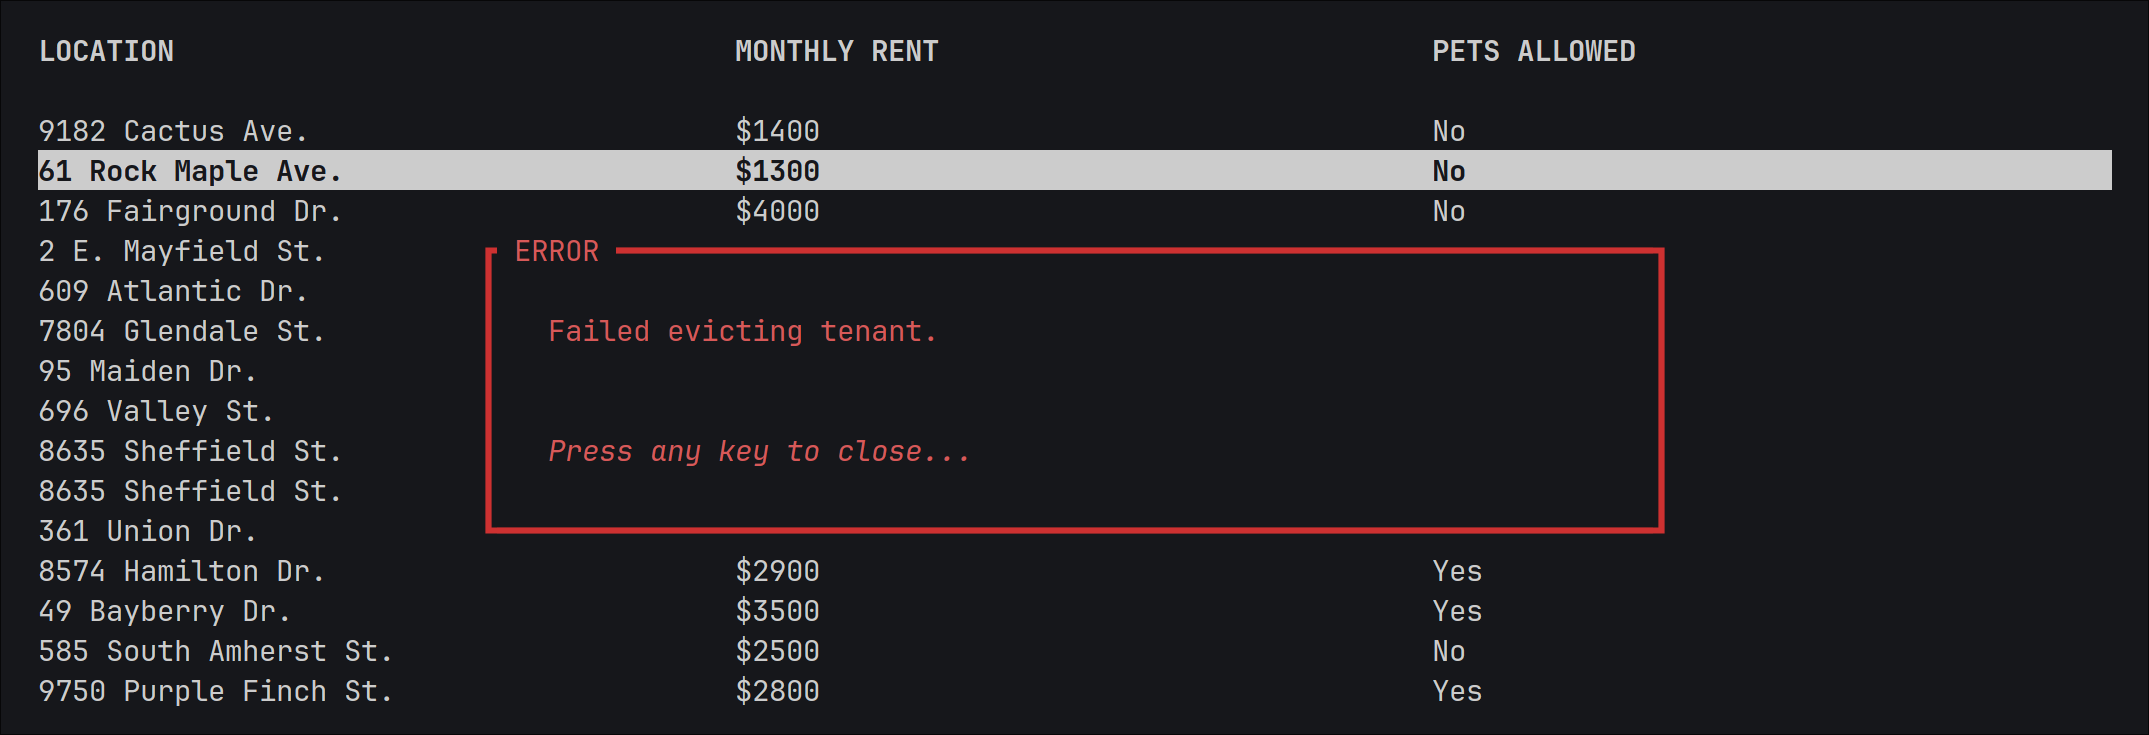
Modal dialogs are small pop-up “windows” displayed atop a background state. They contain messages or prompt for user input and are shown simply by calling a function. Here is an example of showing an error message in a dialog:
// let current_state: &impl State
// let ctx: &mut Context<_>
dialog::error("Failed evicting tenant.", current_state, ctx);
Here, current_state is a reference to whatever state the dialog should be drawn over. If the dialog is
being invoked from within a state, this would be &self. The error dialog — and the dialog::error
function by extension — returns once the user presses a key, acknowledging the error. Above some state
with a Ratatui table, this shows as:
See the dialog module for a full list of the dialogs provided by Tundra, and for how to create your own!
Note that there is nothing magic about dialogs; they are implemented using the same machinery as any other state, but have added logic to store a reference to the background state and to draw it before the dialog.
§User Input
User input is facilitated through the form macro, which displays a dialog containing a specified set of input fields. The return value of the macro invocation is a struct containing the values entered by the user for each field. Here is an example of showing a form, and once it’s been submitted, retrieving the entered values:
use tundra::field::*;

// let current_state: &impl State
// let ctx: &mut Context<_>

let values = dialog::form!{
    location: Textbox{ name: "Location" },
    rent: Slider<u32>{ name: "Monthly rent", range: 1..=5000, step: 50, prefix: "$" },
    pets_allowed: Checkbox{ name: "Pets allowed" },
    [title]: "Register Rent Unit",
    [context]: ctx,
    [background]: current_state,
};

if let Some(values) = values {
    let location: String = values.location;
    let rent: u32 = values.rent;
    let pets_allowed: bool = values.pets_allowed;
}
Some notes about the example:
- As with other dialogs, a context and background state must be provided. For forms, this is done with
the
[context]and[background]“meta-fields.” - The values (and the fields) are stored as members of unspellable structs created inside the macro — no runtime lookup is required! Values are accessed using the same identifers that the corresponding fields were declared with.
- Forms can be cancelled by the user, which is represented by a
Nonereturn value. - The type annotations for the field values are not required.
Above some state with a Ratatui table (and with some example data entered), this shows as:
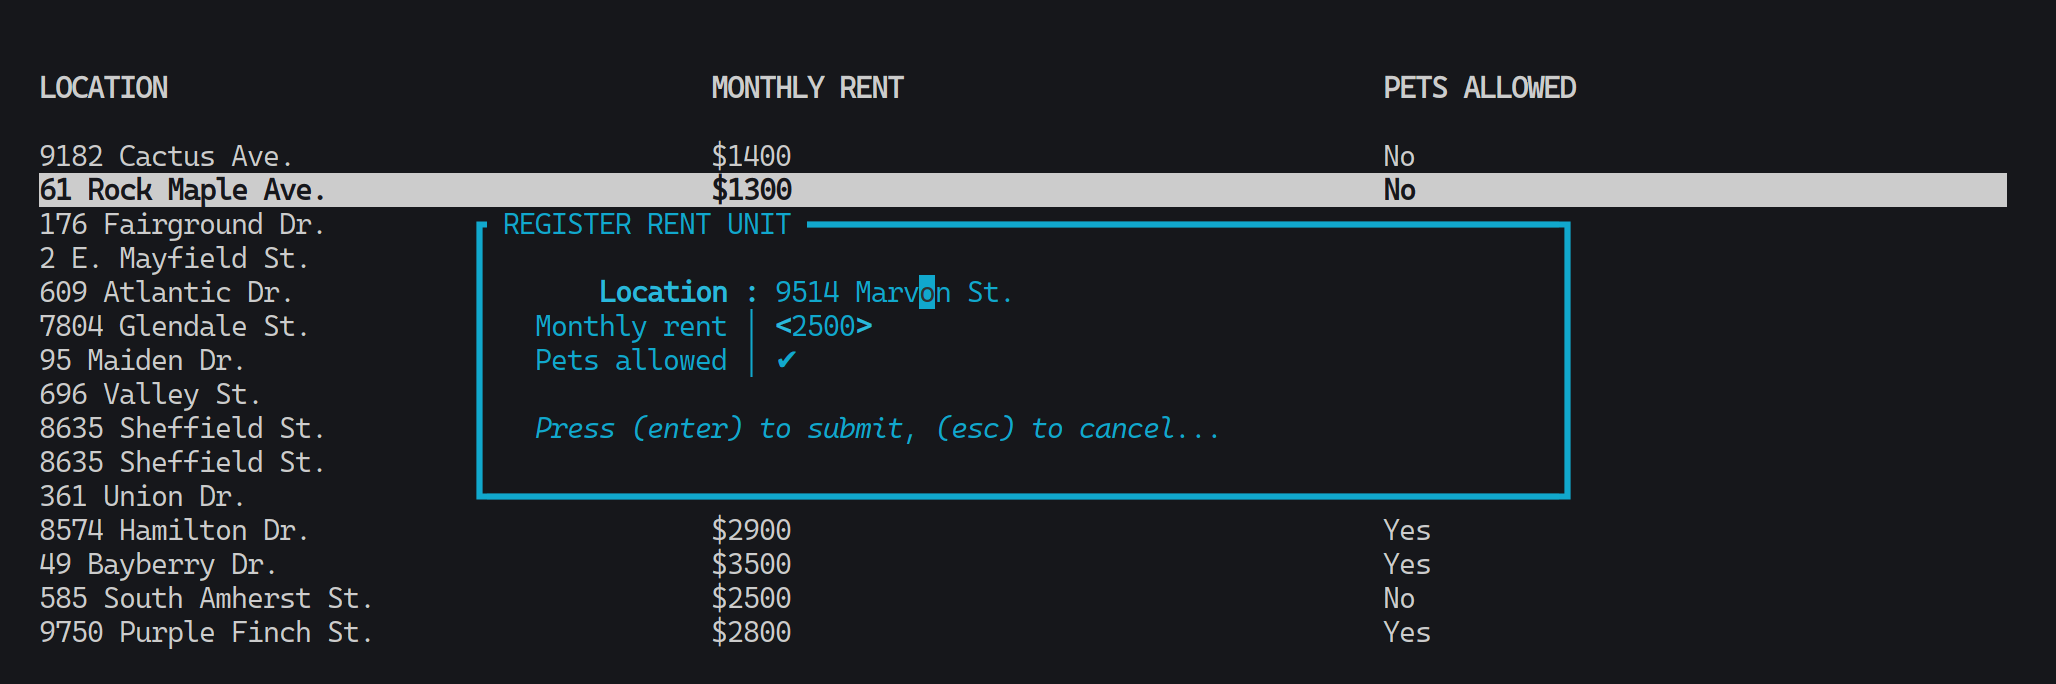
See the form macro for the complete macro specification, and see the field module for a full list of the field types provided by Tundra, and for how to create your own!
§A Note on the Backend
Ratatui has support for several terminal backends. If you don’t know what that means, this note holds no significance for you.
Tundra currently only supports the crossterm backend. This is due to a lack of abstraction over the different backends. Code — particularly pertaining to context and event handling — would have to be written and repeated for each backend.
If you need another backend for your project, Tundra is not for you — at least for the moment.
§Examples
See the examples folder on GitHub.
Re-exports§
pub use crossterm::event::KeyCode;pub use crossterm::event::KeyEvent;pub use crossterm::event::KeyModifiers;pub use ratatui::Frame;
Modules§
- dialog
- Modal dialogs displayed in the middle of the screen, covering some background
State. - field
- Input fields for allowing the user to enter various kinds of data.
- prelude
- Exposes symbols required in virtually all applications.
Macros§
Structs§
- Context
- Manages the terminal environment.
Enums§
Traits§
- Result
Like - Generalisation over data-carrying
Result-like types. - State
- Defines the event loop of an application state.